USING AWS CODEDEPLOY TO PUSH NEW VERSIONS OF YOUR APPLICATION

Getting new code onto our servers can be done in a multitude of ways these days. Configuration management tools can pull down new code, pipelines can run scripts across our fleets, or we could run around with a USB stick for the rest of our lives. With container-based apps, serverless functions, and immutable infrastructure, we’ve changed this conversation quite a bit, as well. But what about a plain old server that needs a new version of code deployed on it? AWS CodeDeploy can help us to manage our software versions and rollbacks so that we have a consistent method to update our apps across multiple instances. This post will demonstrate how to get started with AWS CodeDeploy so that you can manage the deployment of new versions of your apps.
Set Up IAM Roles
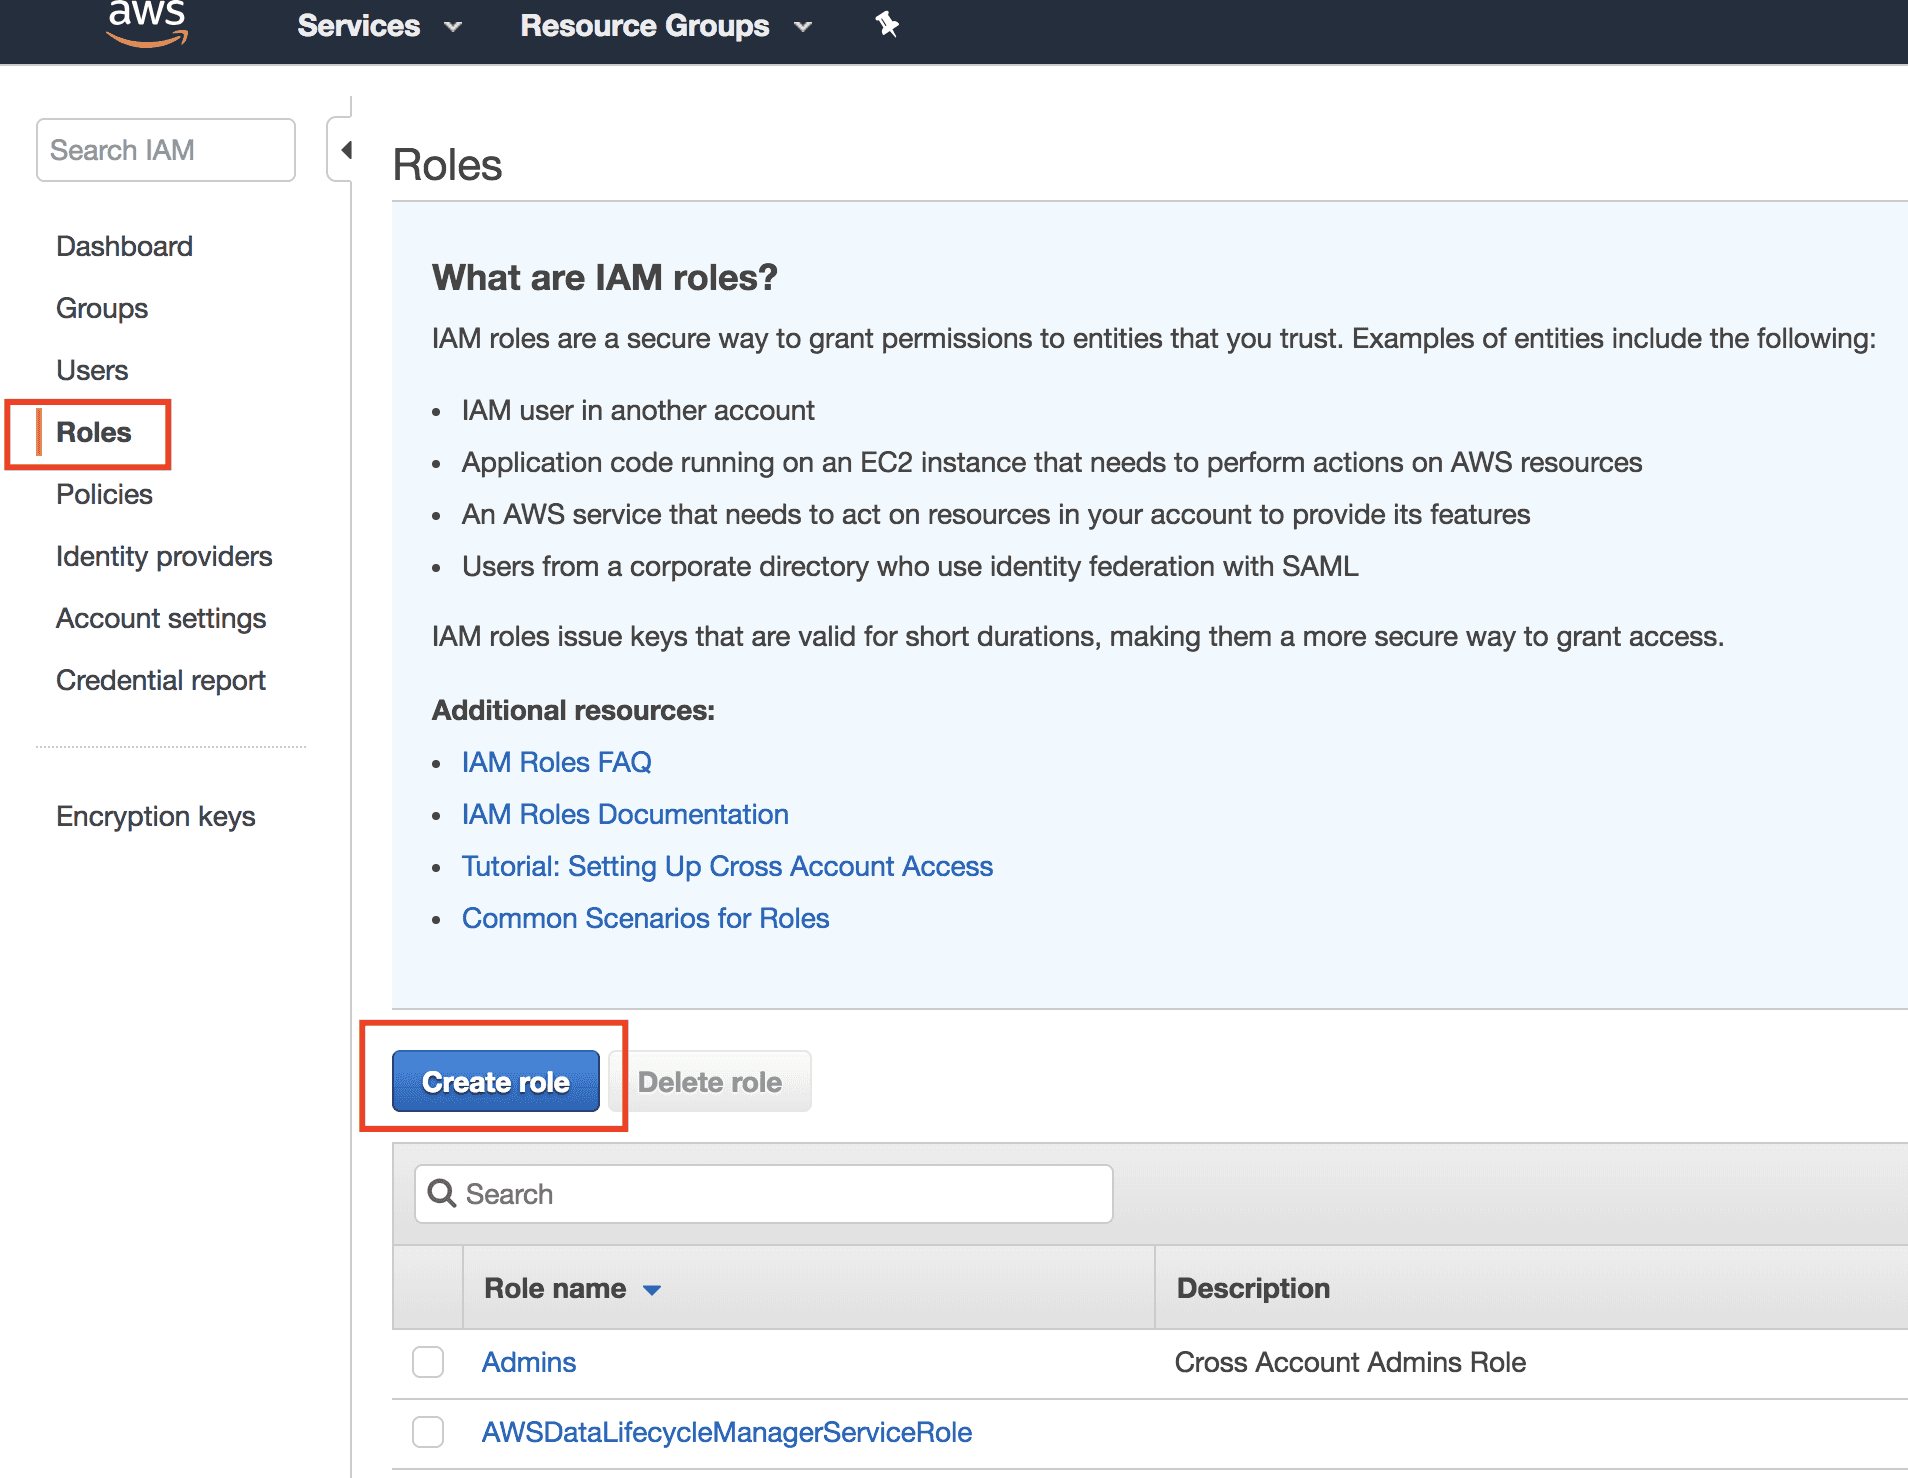
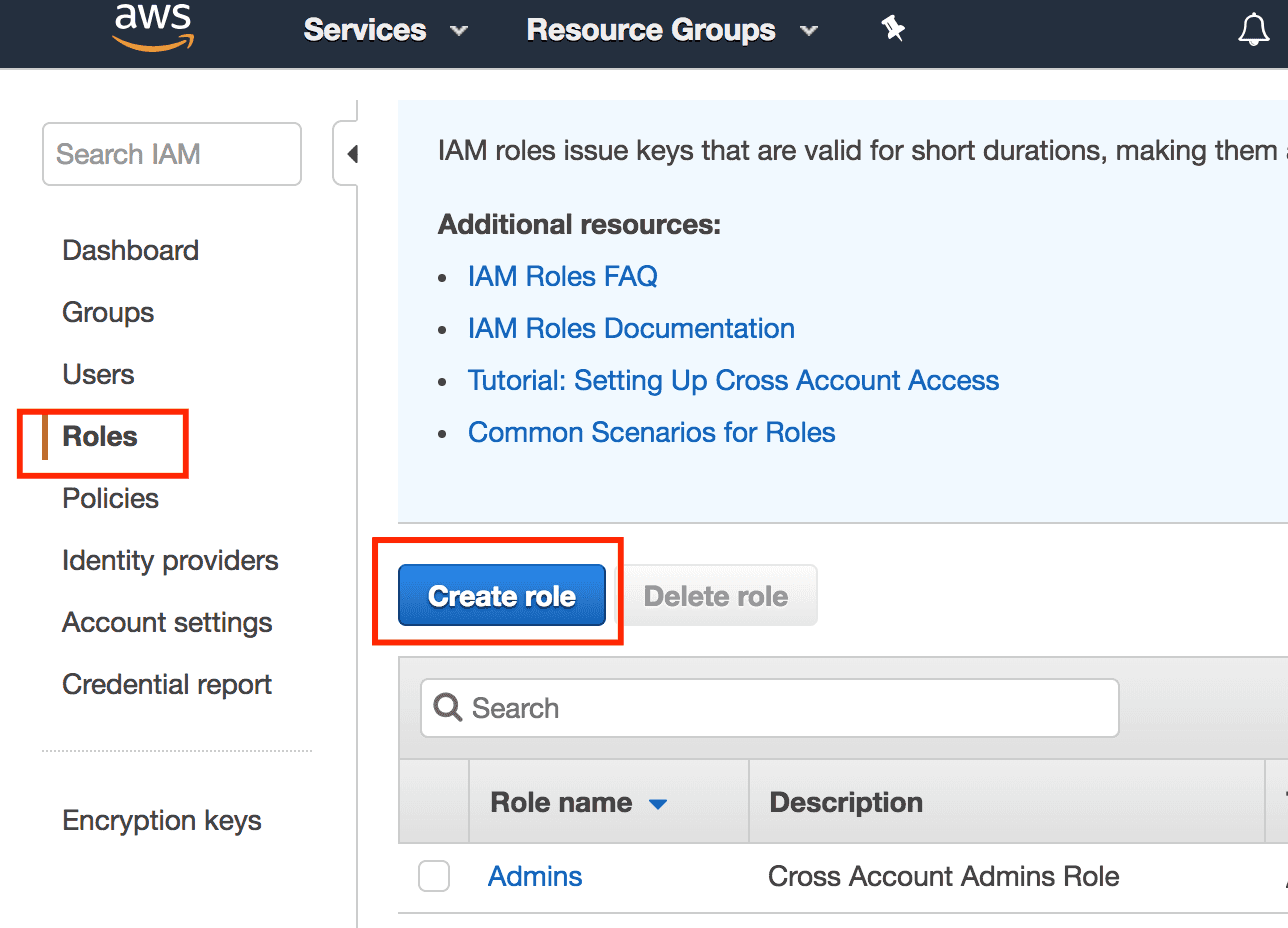
Before we start, I’ll assume that you’ve got a user account with administrator permissions so that you can deploy the necessary roles, servers, and tools. After this, we need to start by setting up some permissions for CodeDeploy. First, we need to create a service role for CodeDeploy so that it can read tags applied to instances and take some actions for us. Go to the IAM console and click on the Roles tab. Then click “Create role”.
Choose AWS service for the trusted entity and then choose CodeDeploy.
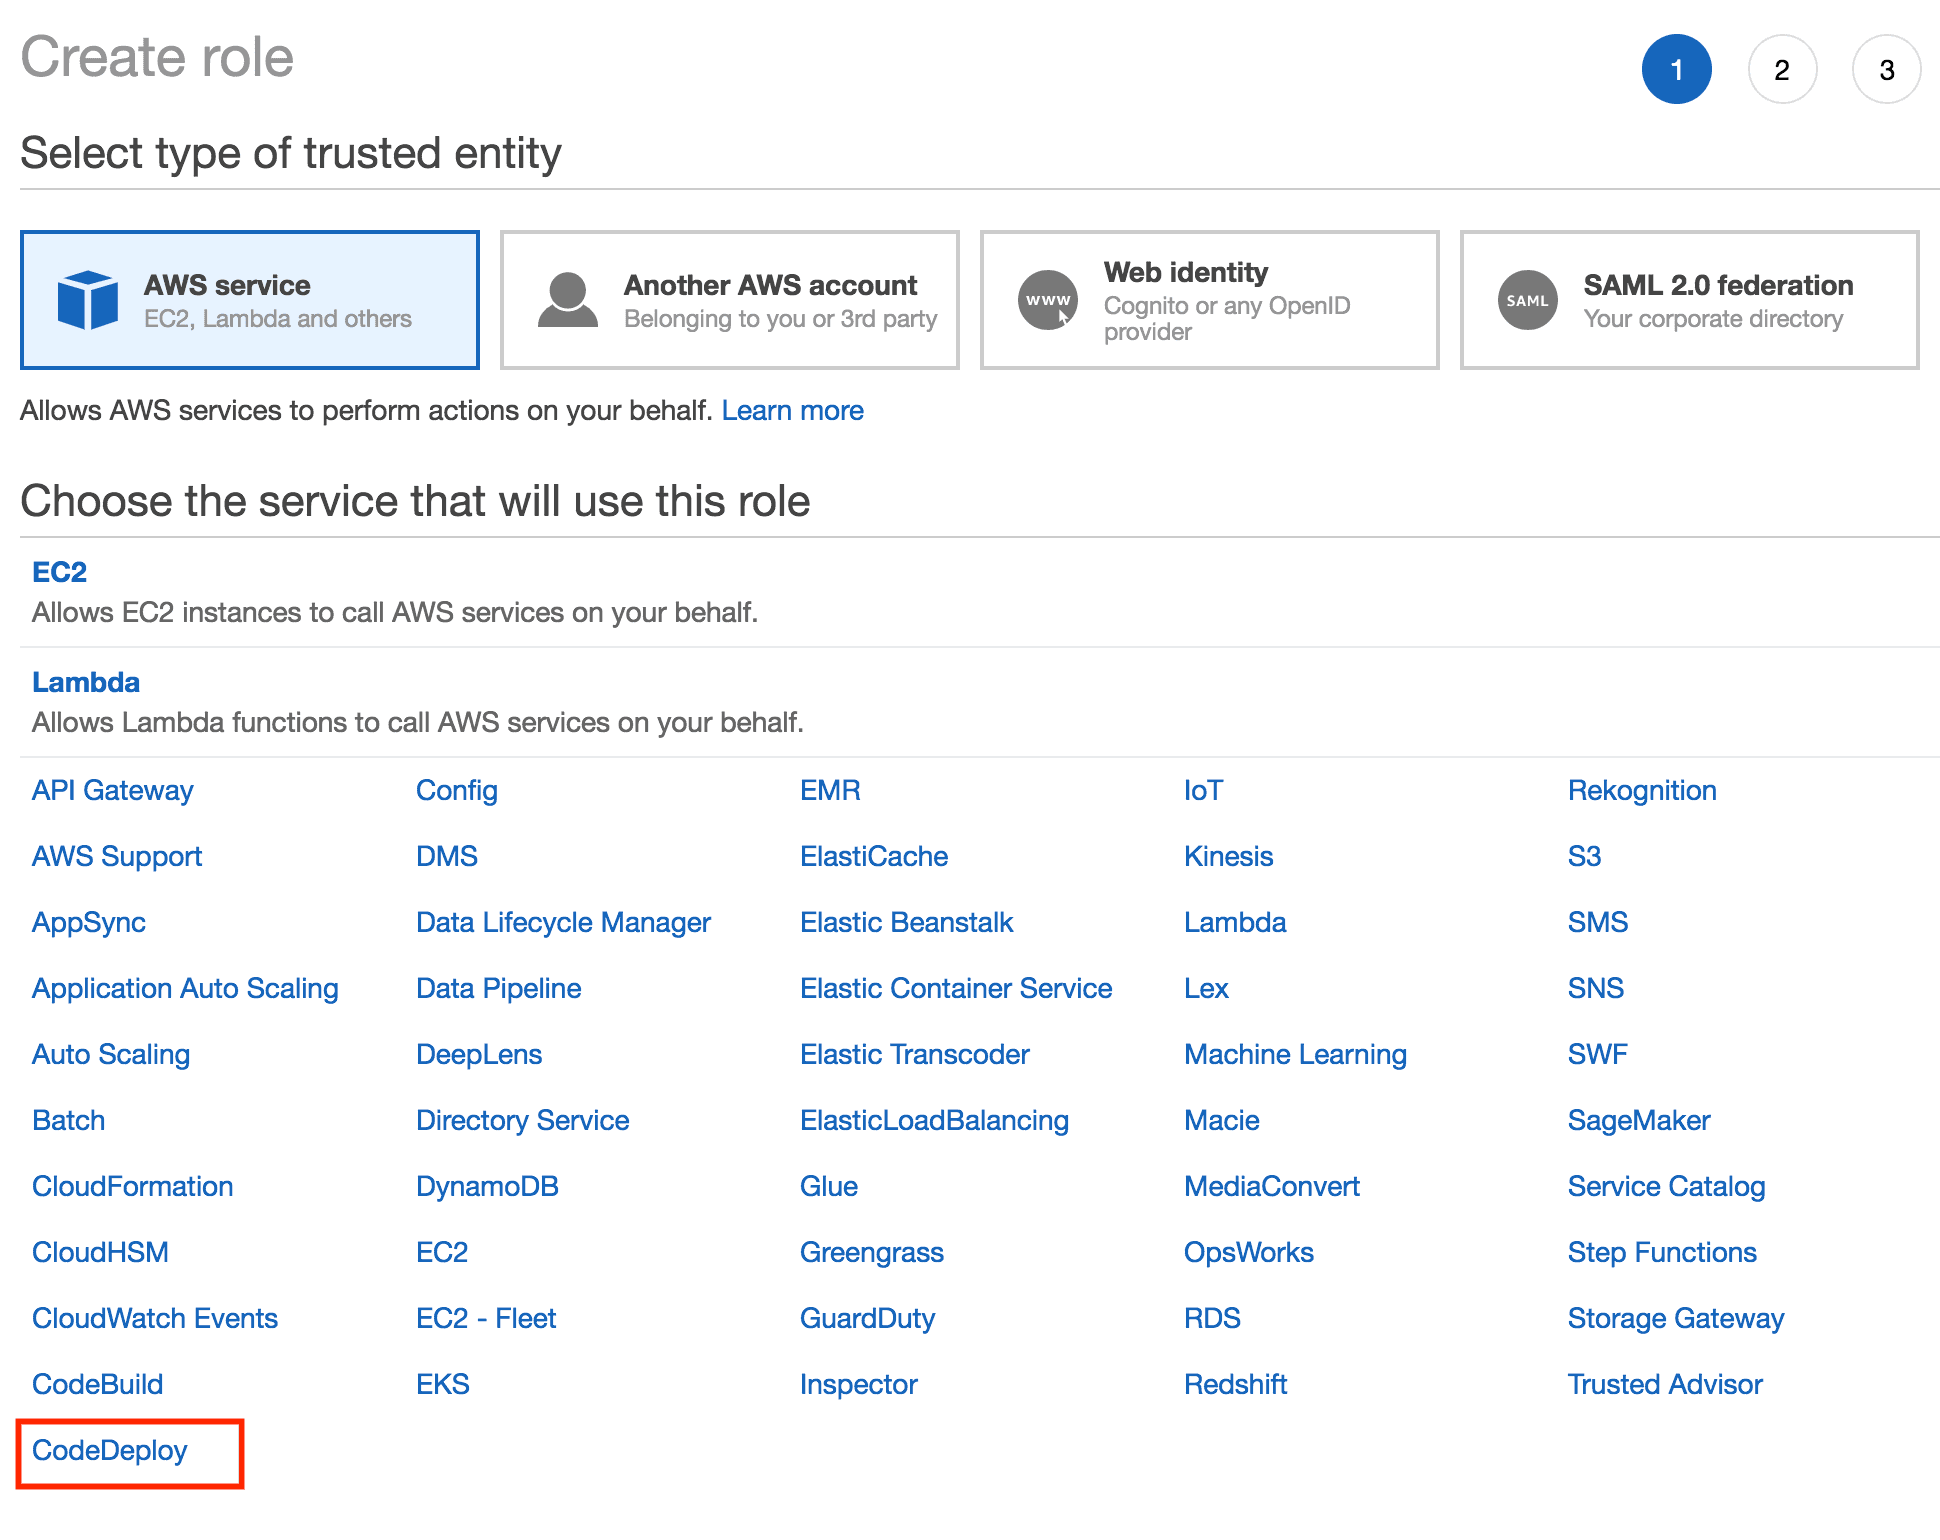
After this, select the use case. For this post we’re deploying code on EC2 instances and not Lambda code, so select the “CodeDeploy” use case.

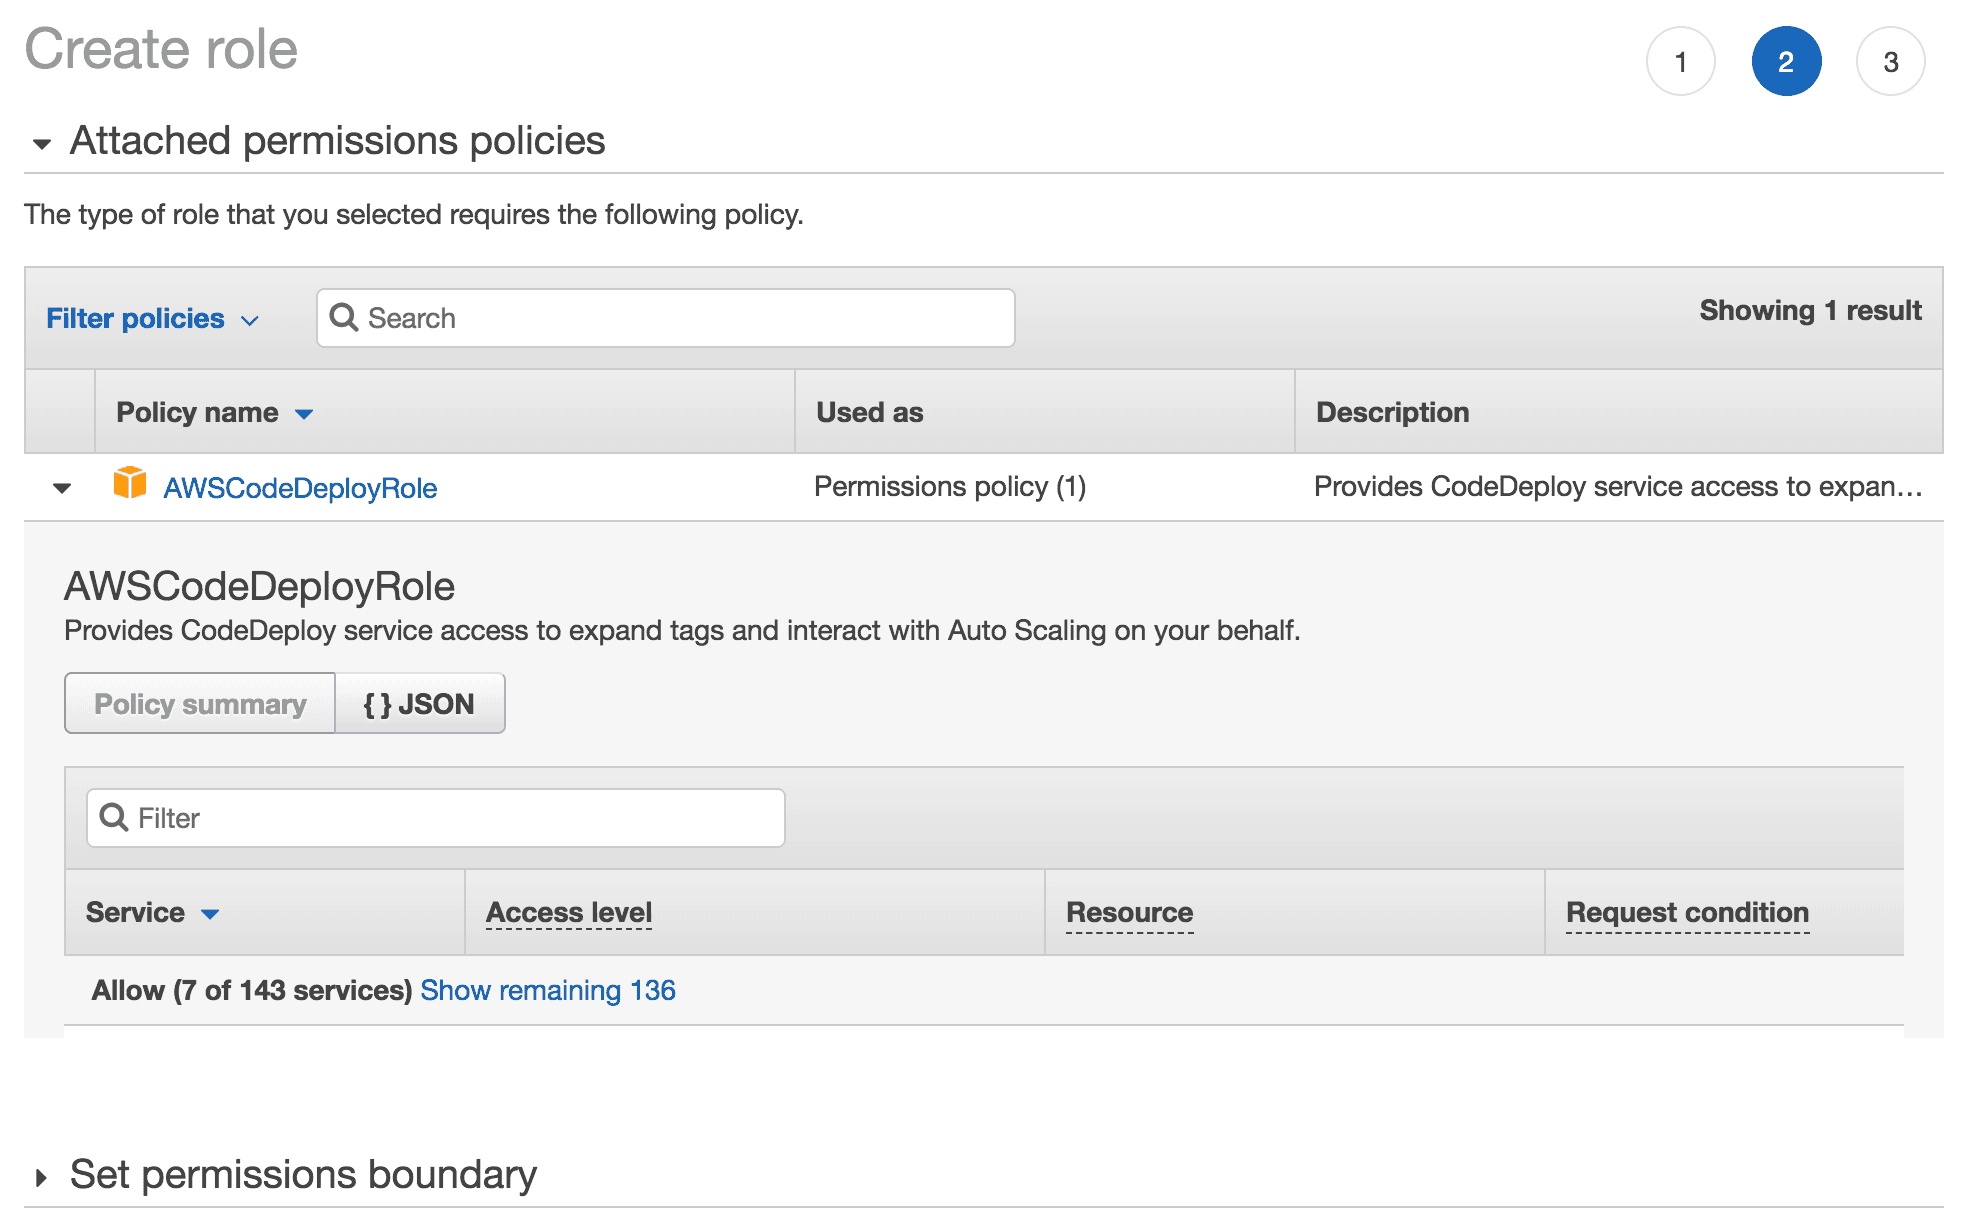
On the next screen choose the AWSCodeDeployRole policy.
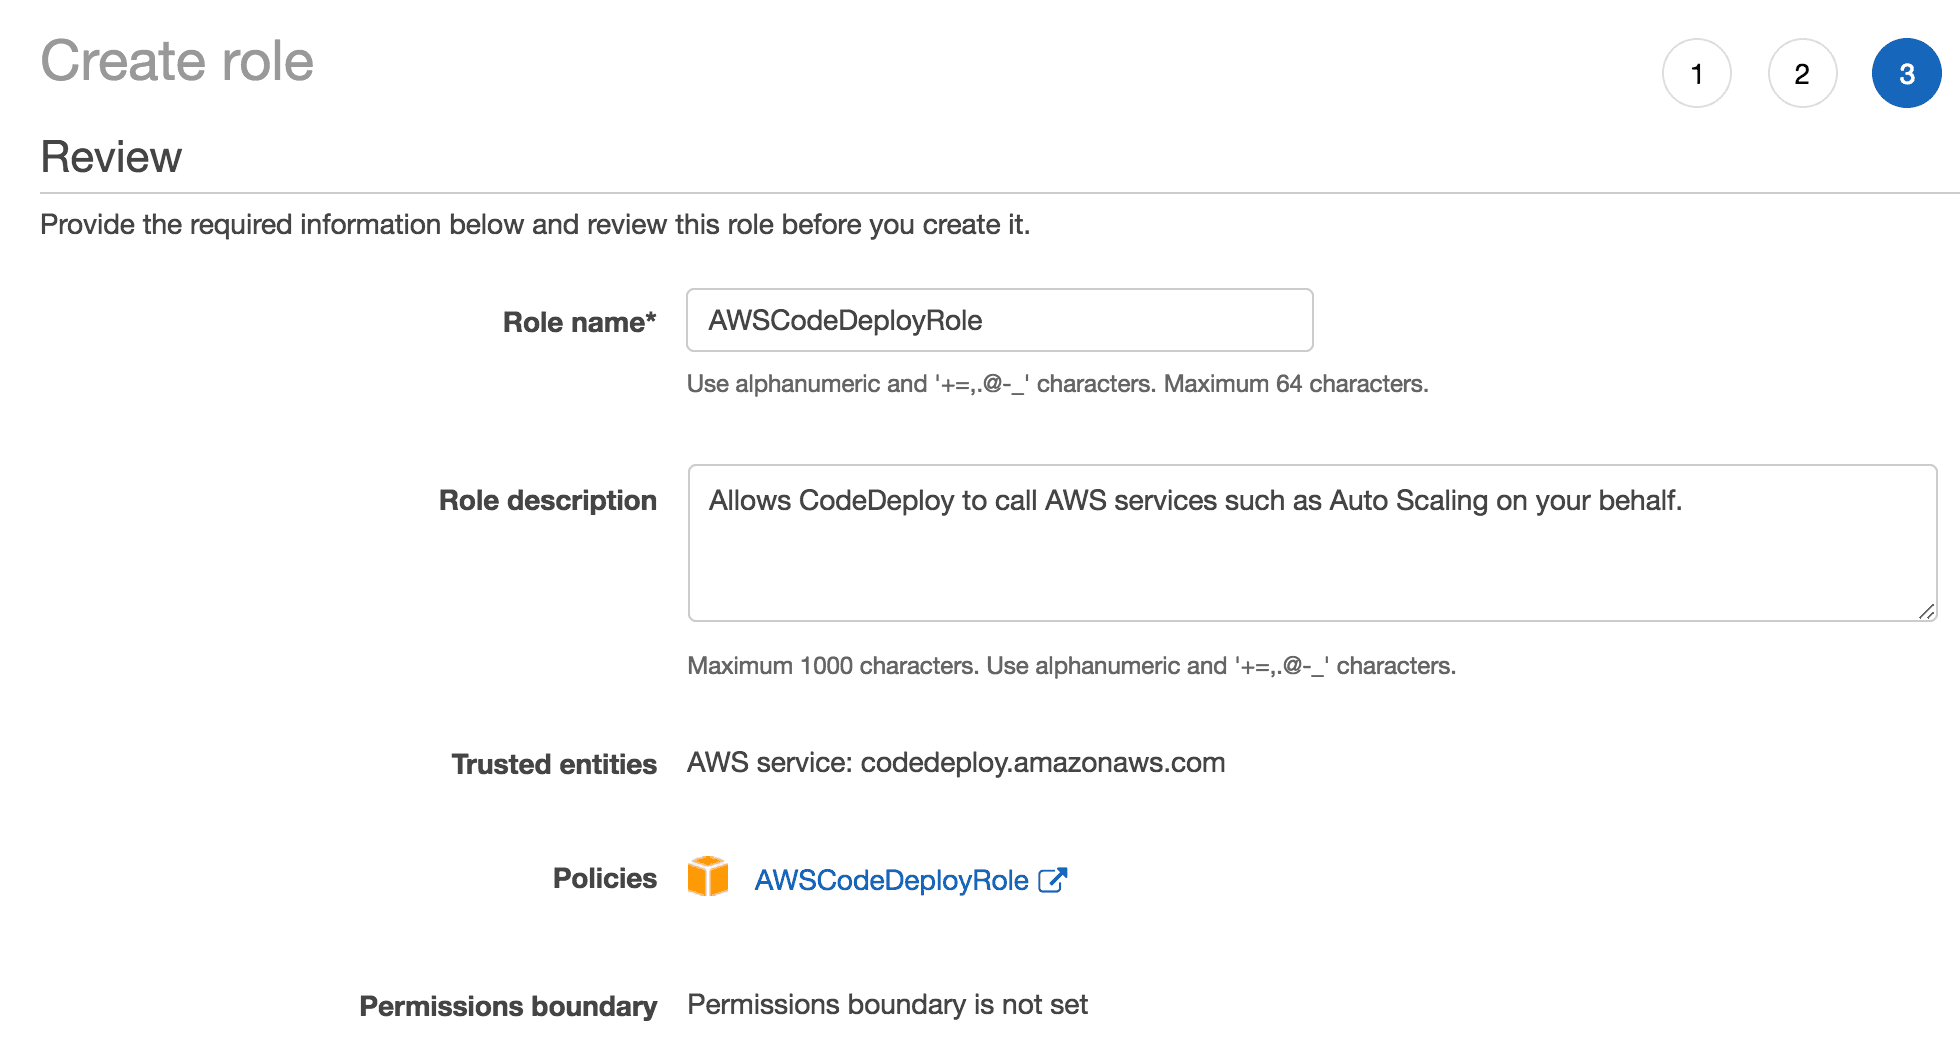
On the last screen give it a descriptive name.
Now that we have a role, we need to add a new policy. While still in the IAM console, choose the policies tab and then click the ��“Create policy” button.
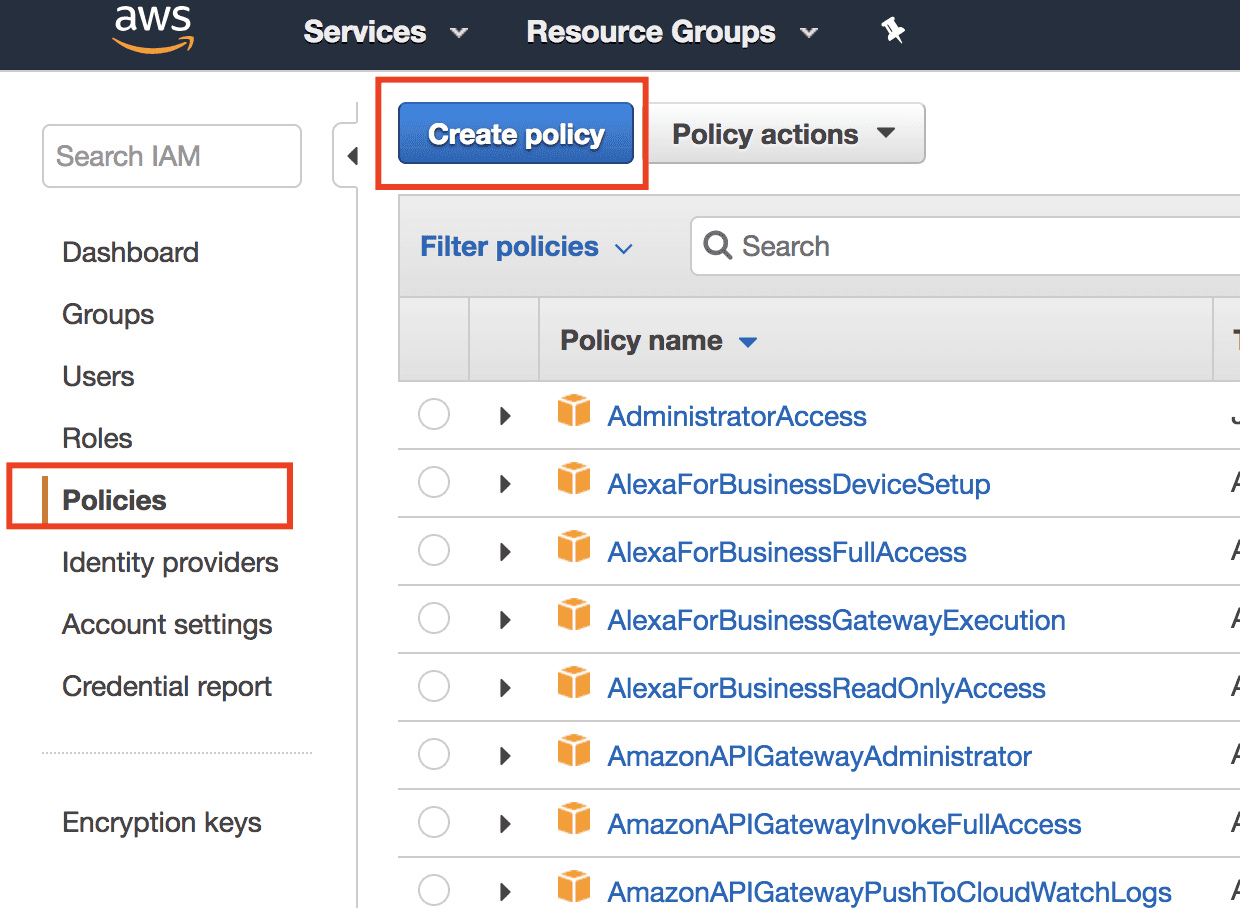
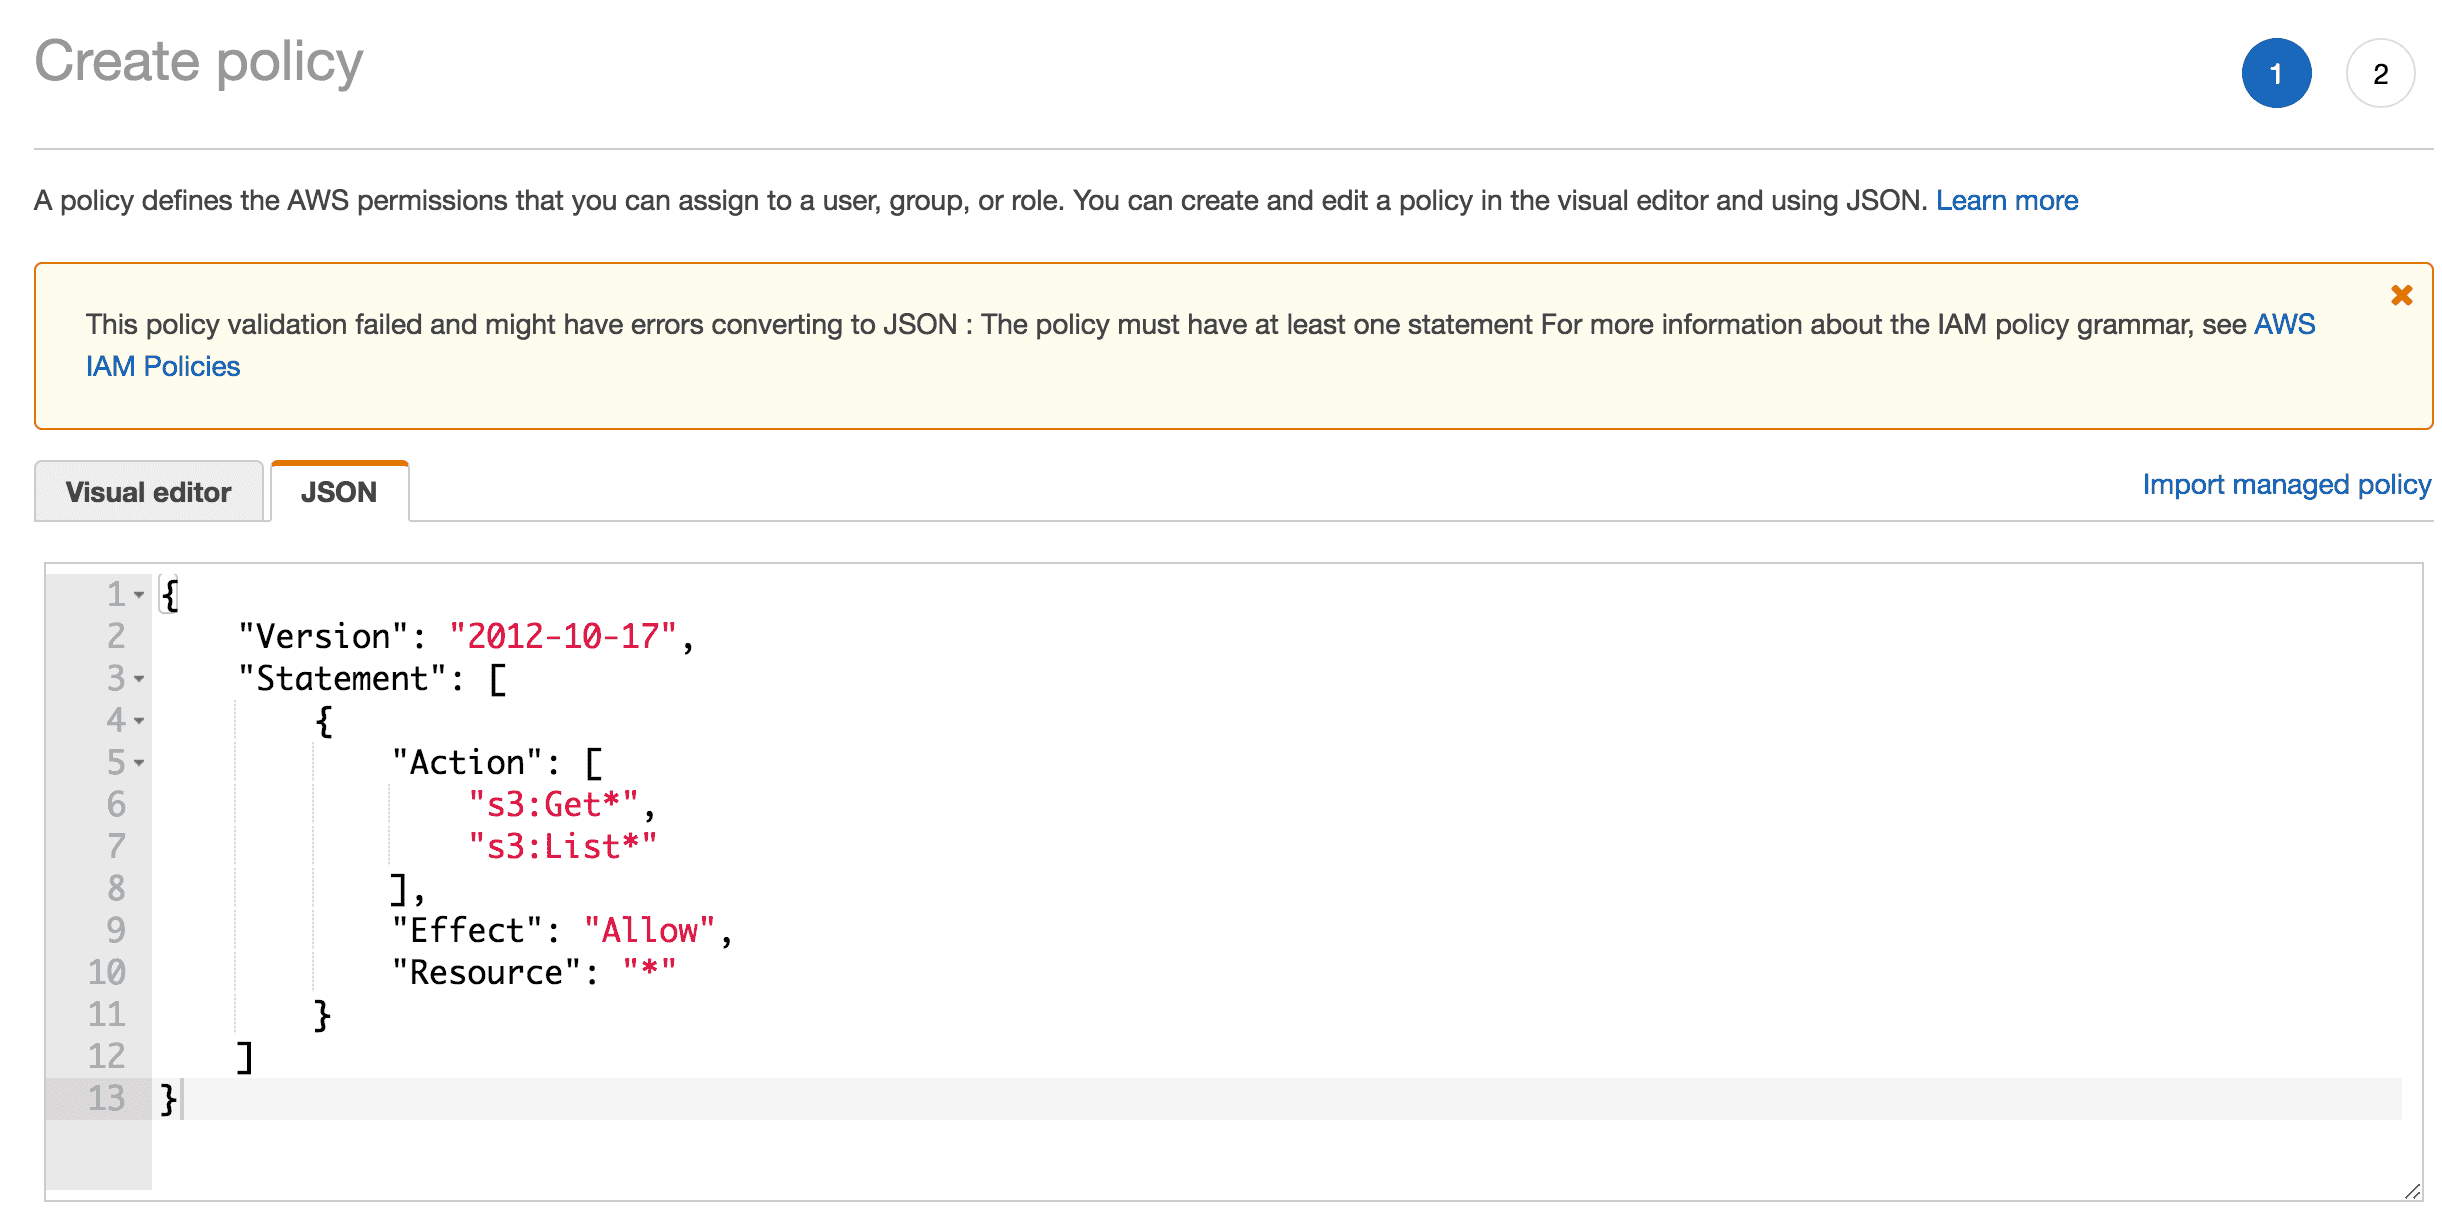
In the create policy screen, choose the JSON tab and enter the JSON seen below. This policy allows the assumed role to read from all S3 buckets. We’ll be attaching this policy to an instance profile and eventually our servers.
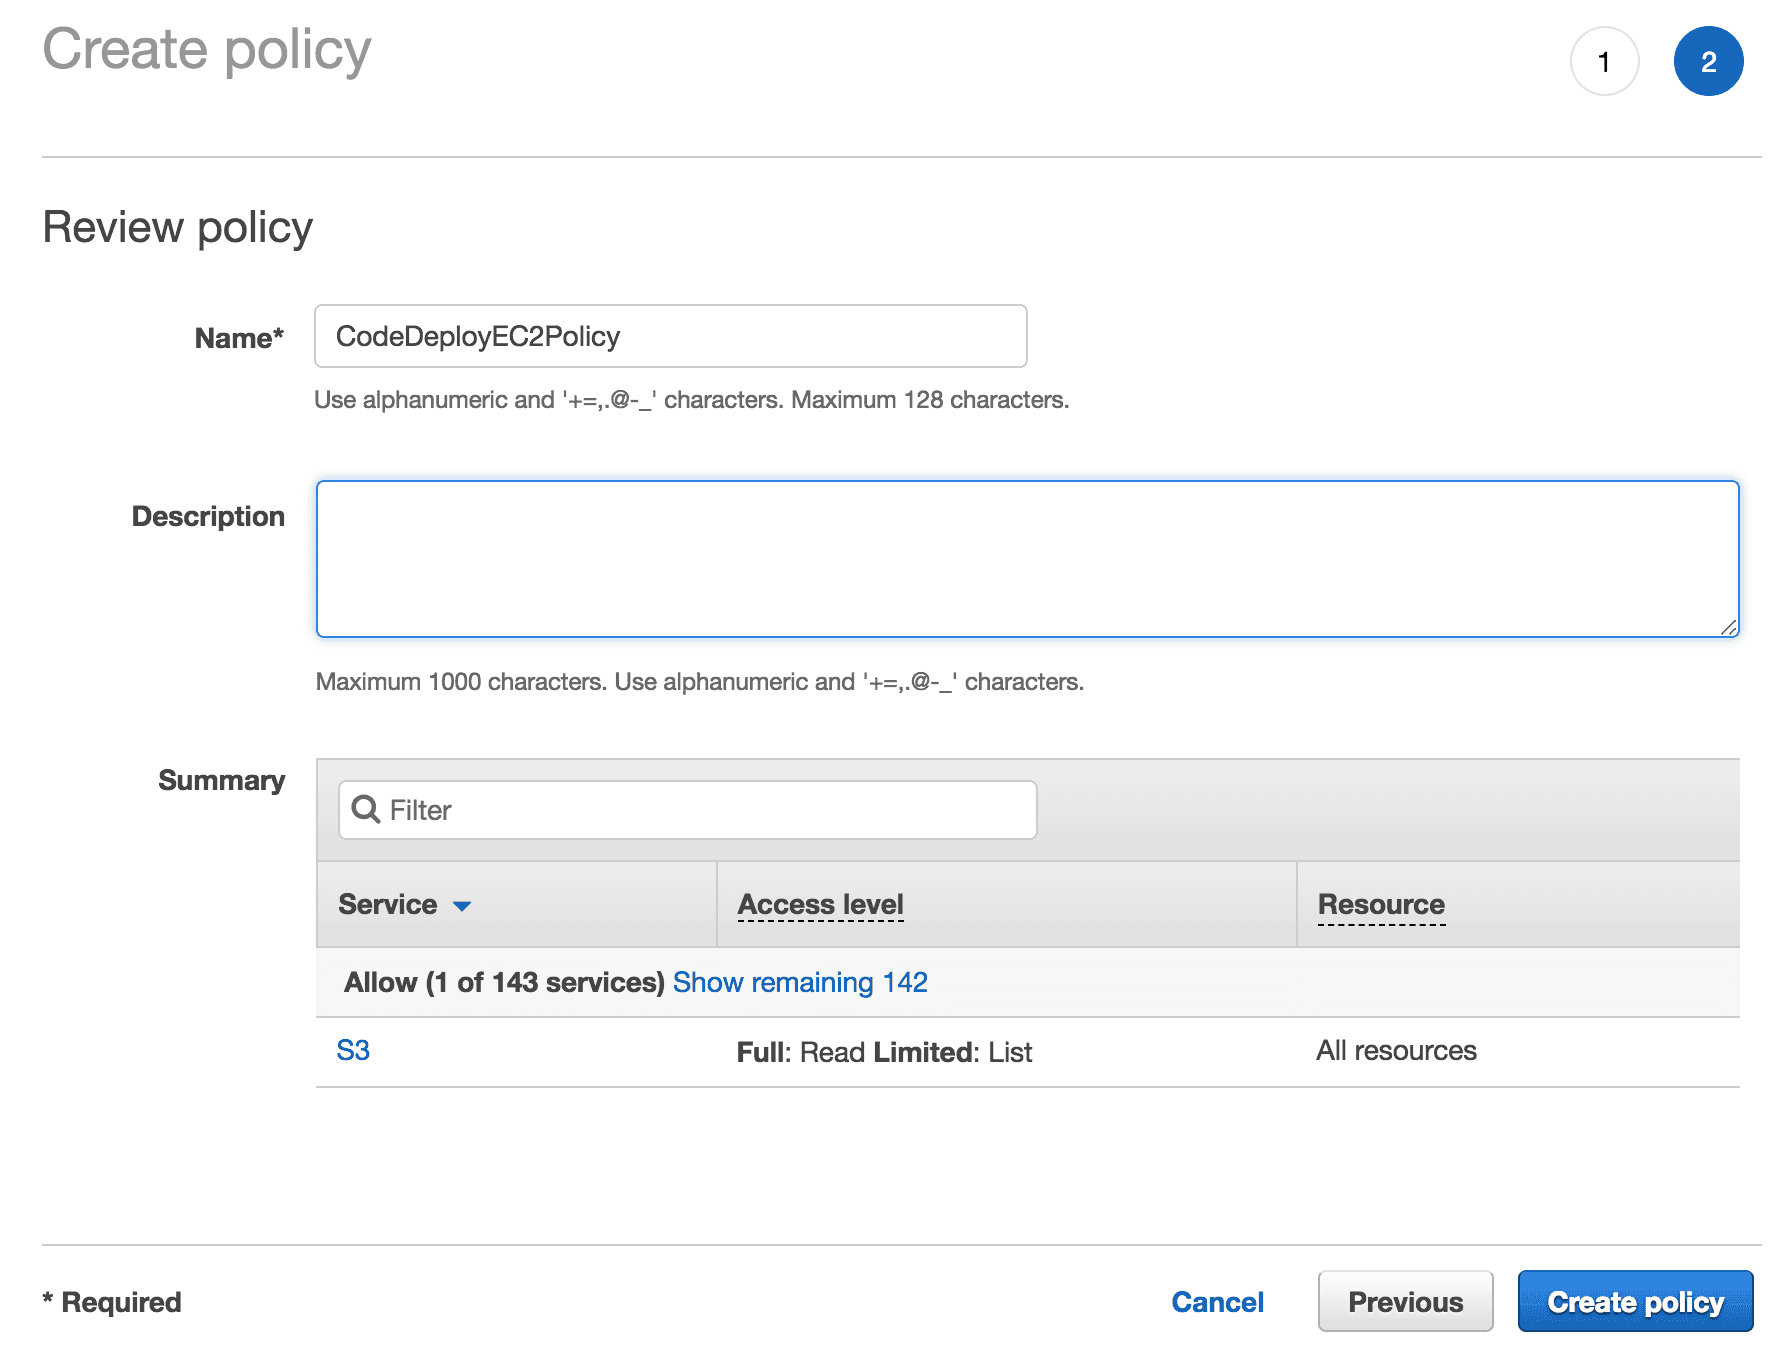
On the last screen, enter a name for the policy and then click the “Create policy” button.
Let’s create a second role now for this new policy.
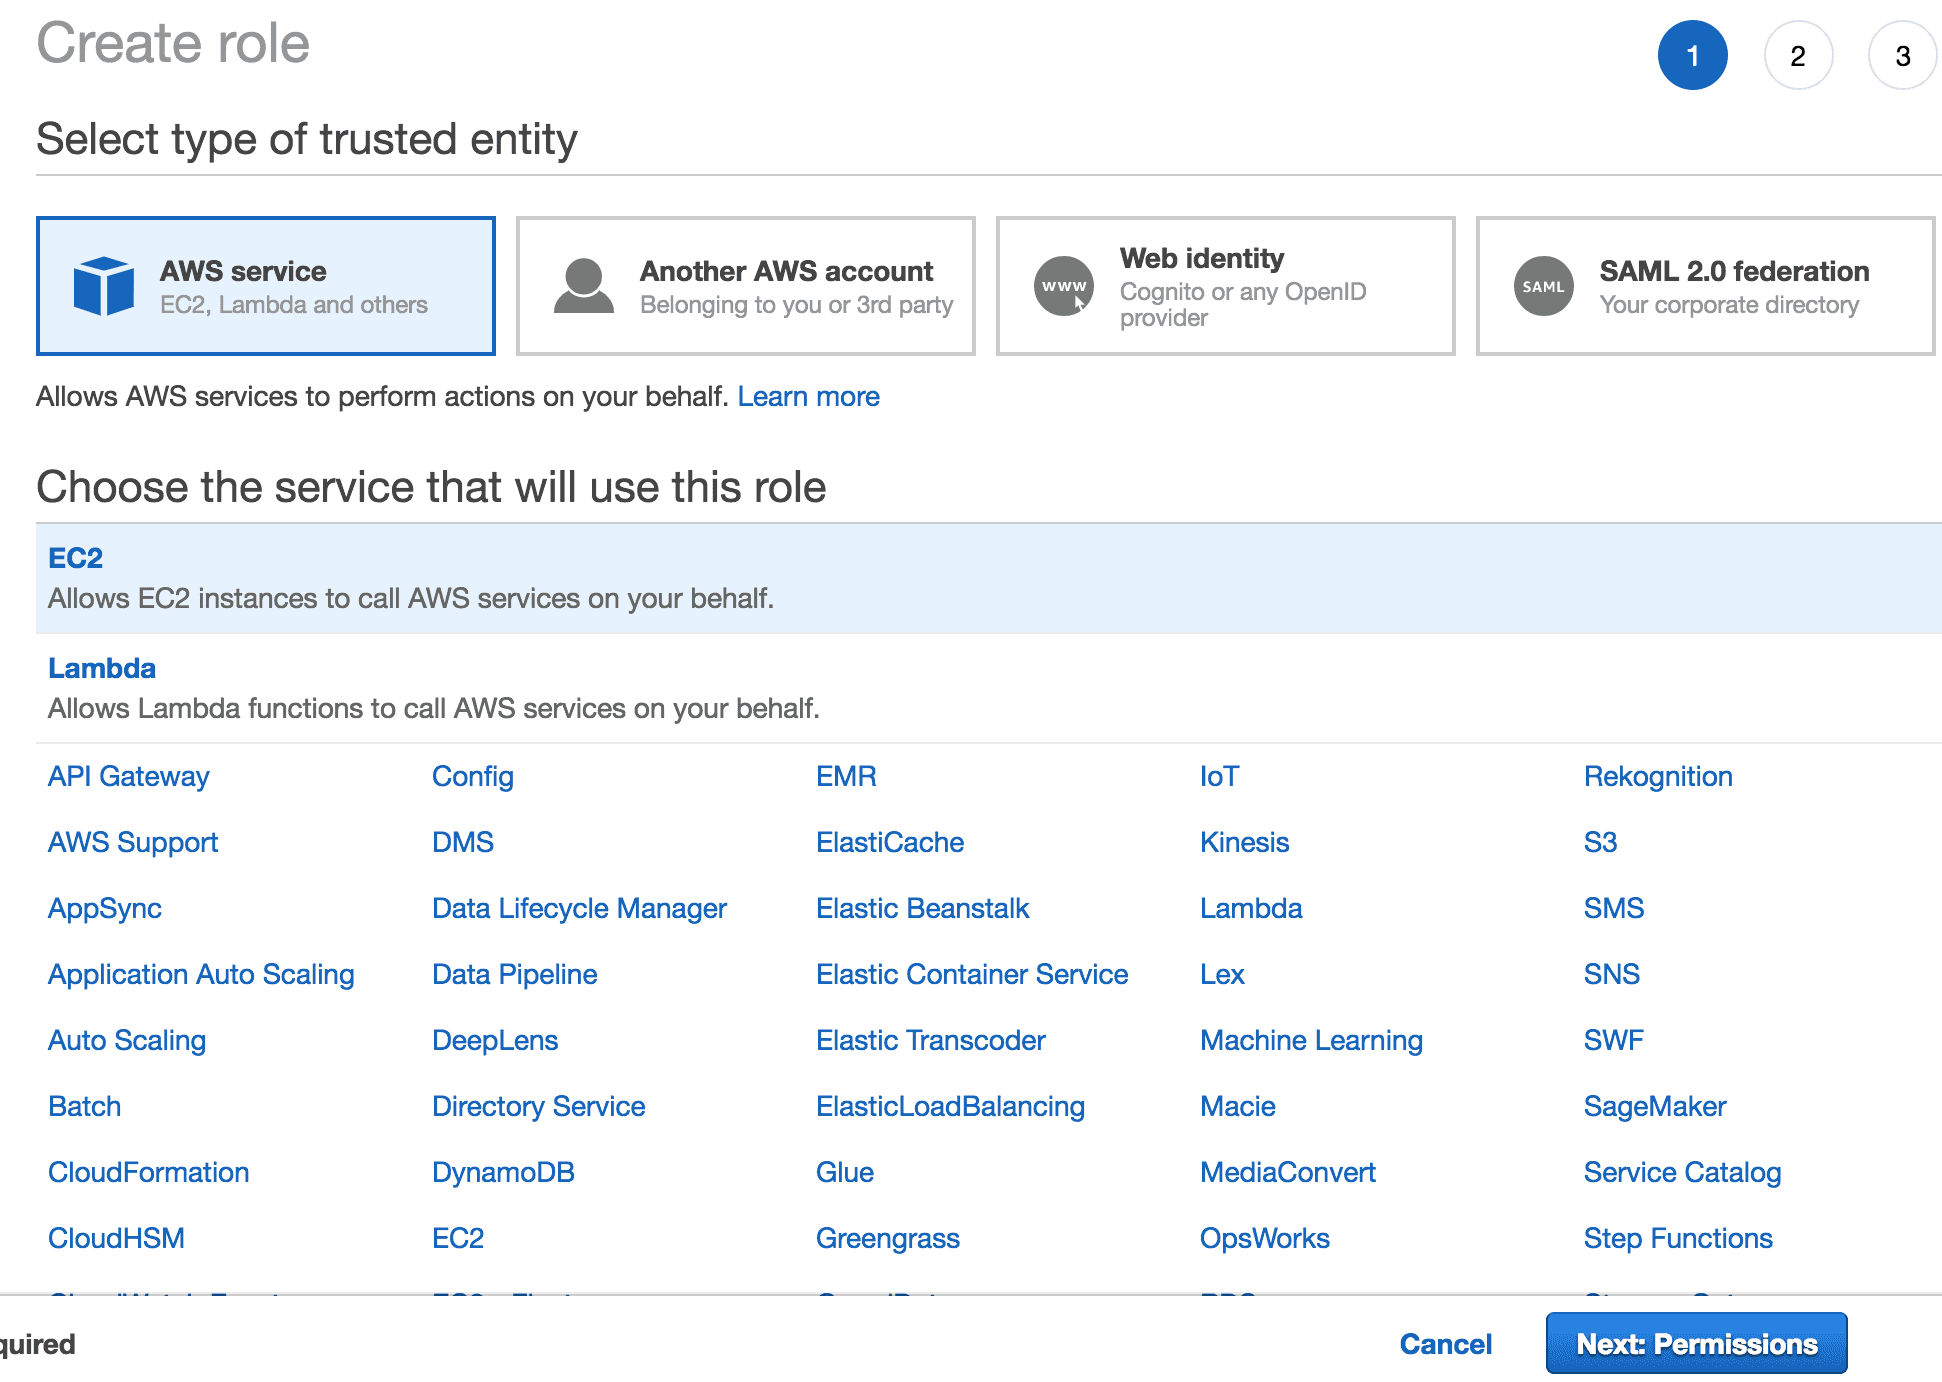
This time, select the “EC2” service so that our servers can access the S3 buckets.
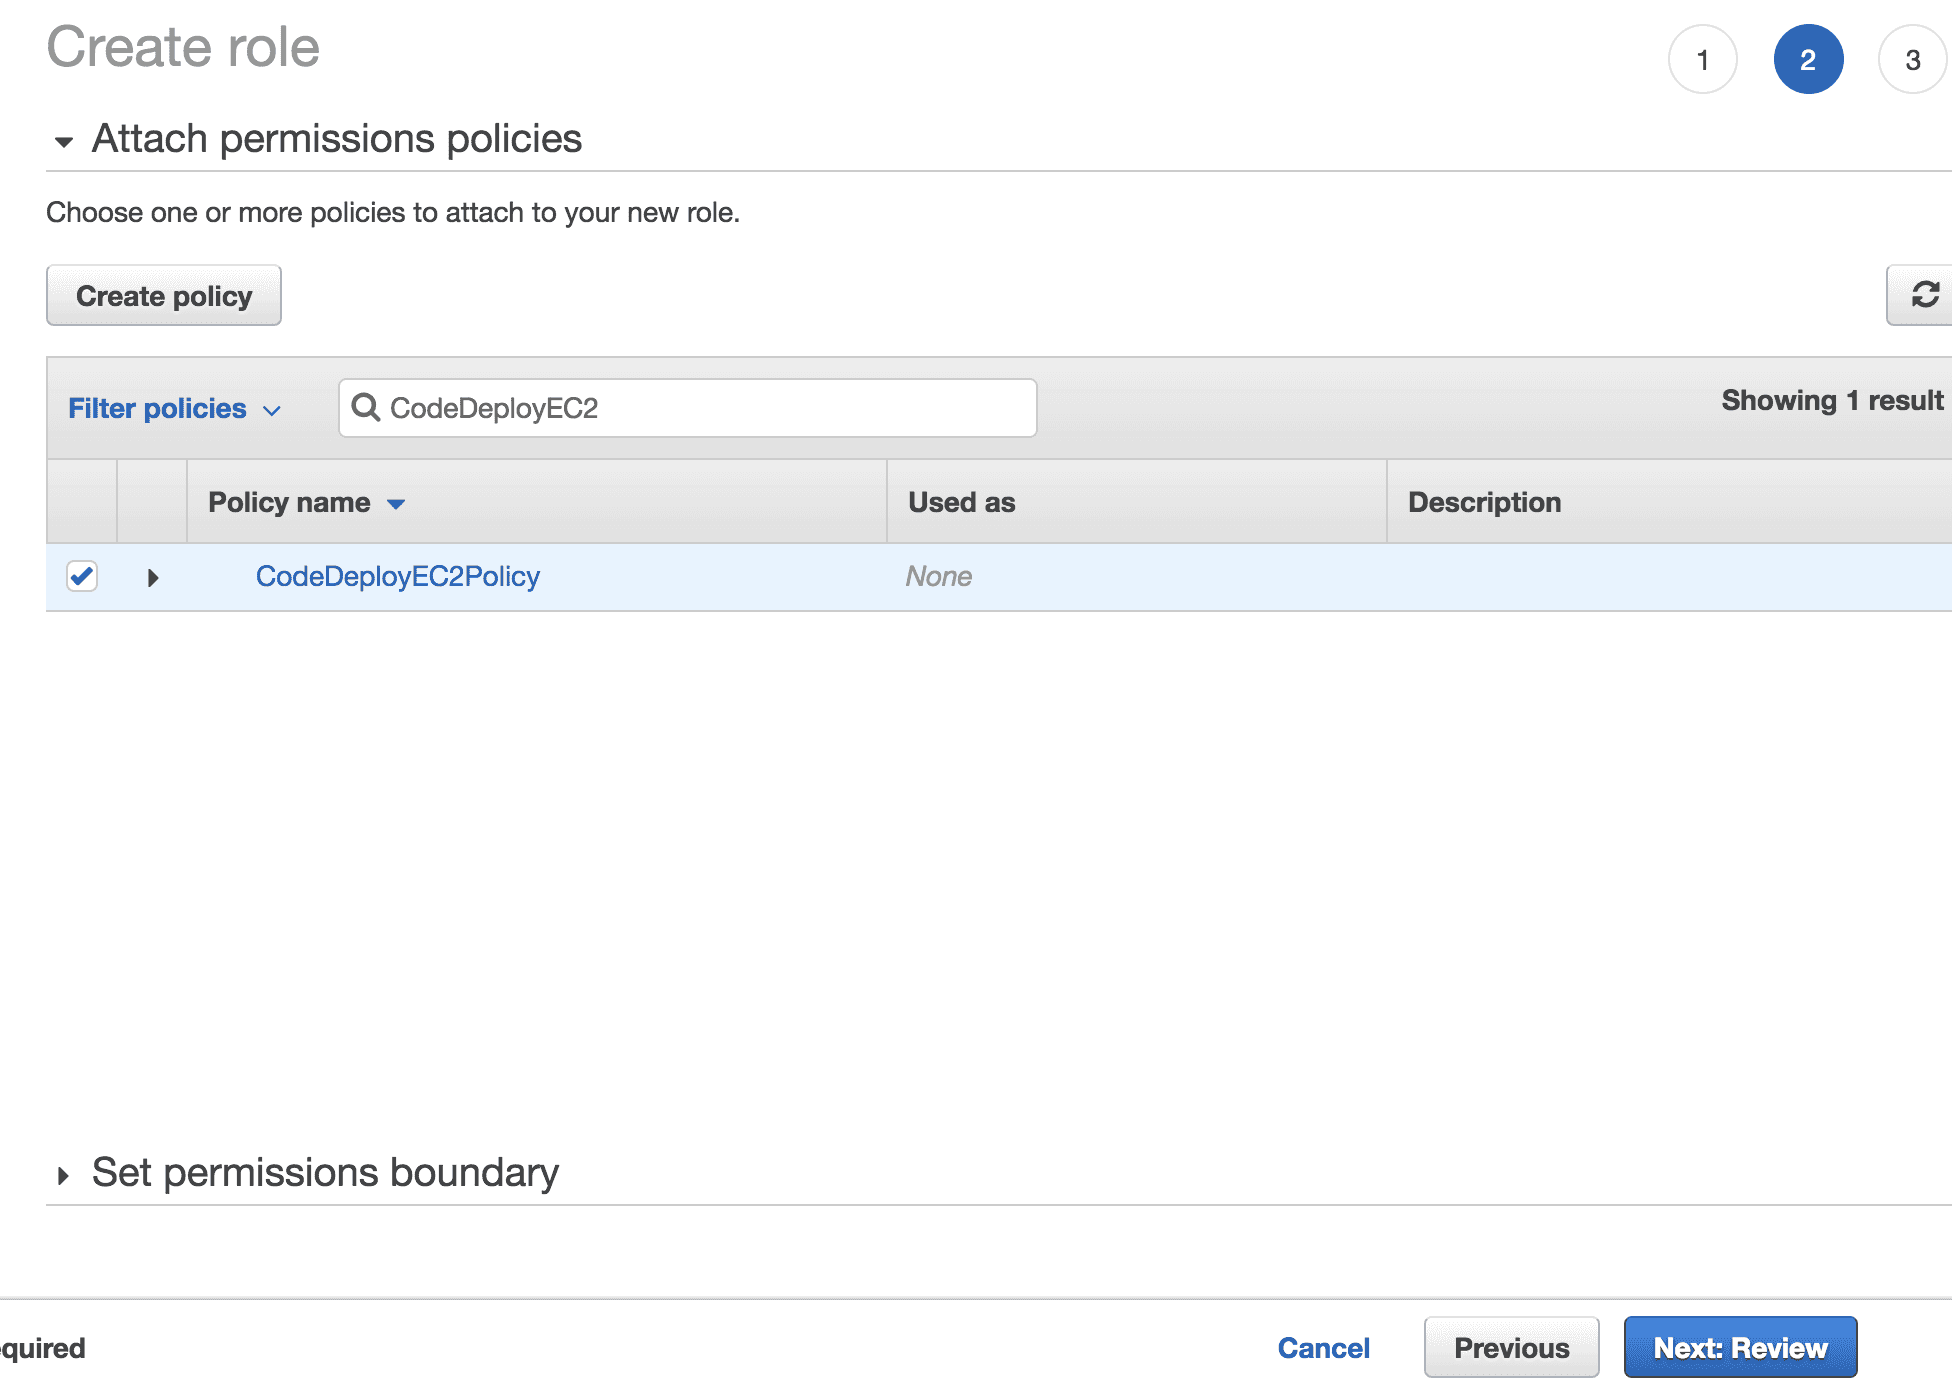
On the attach permissions policies screen, select the policy we just created.
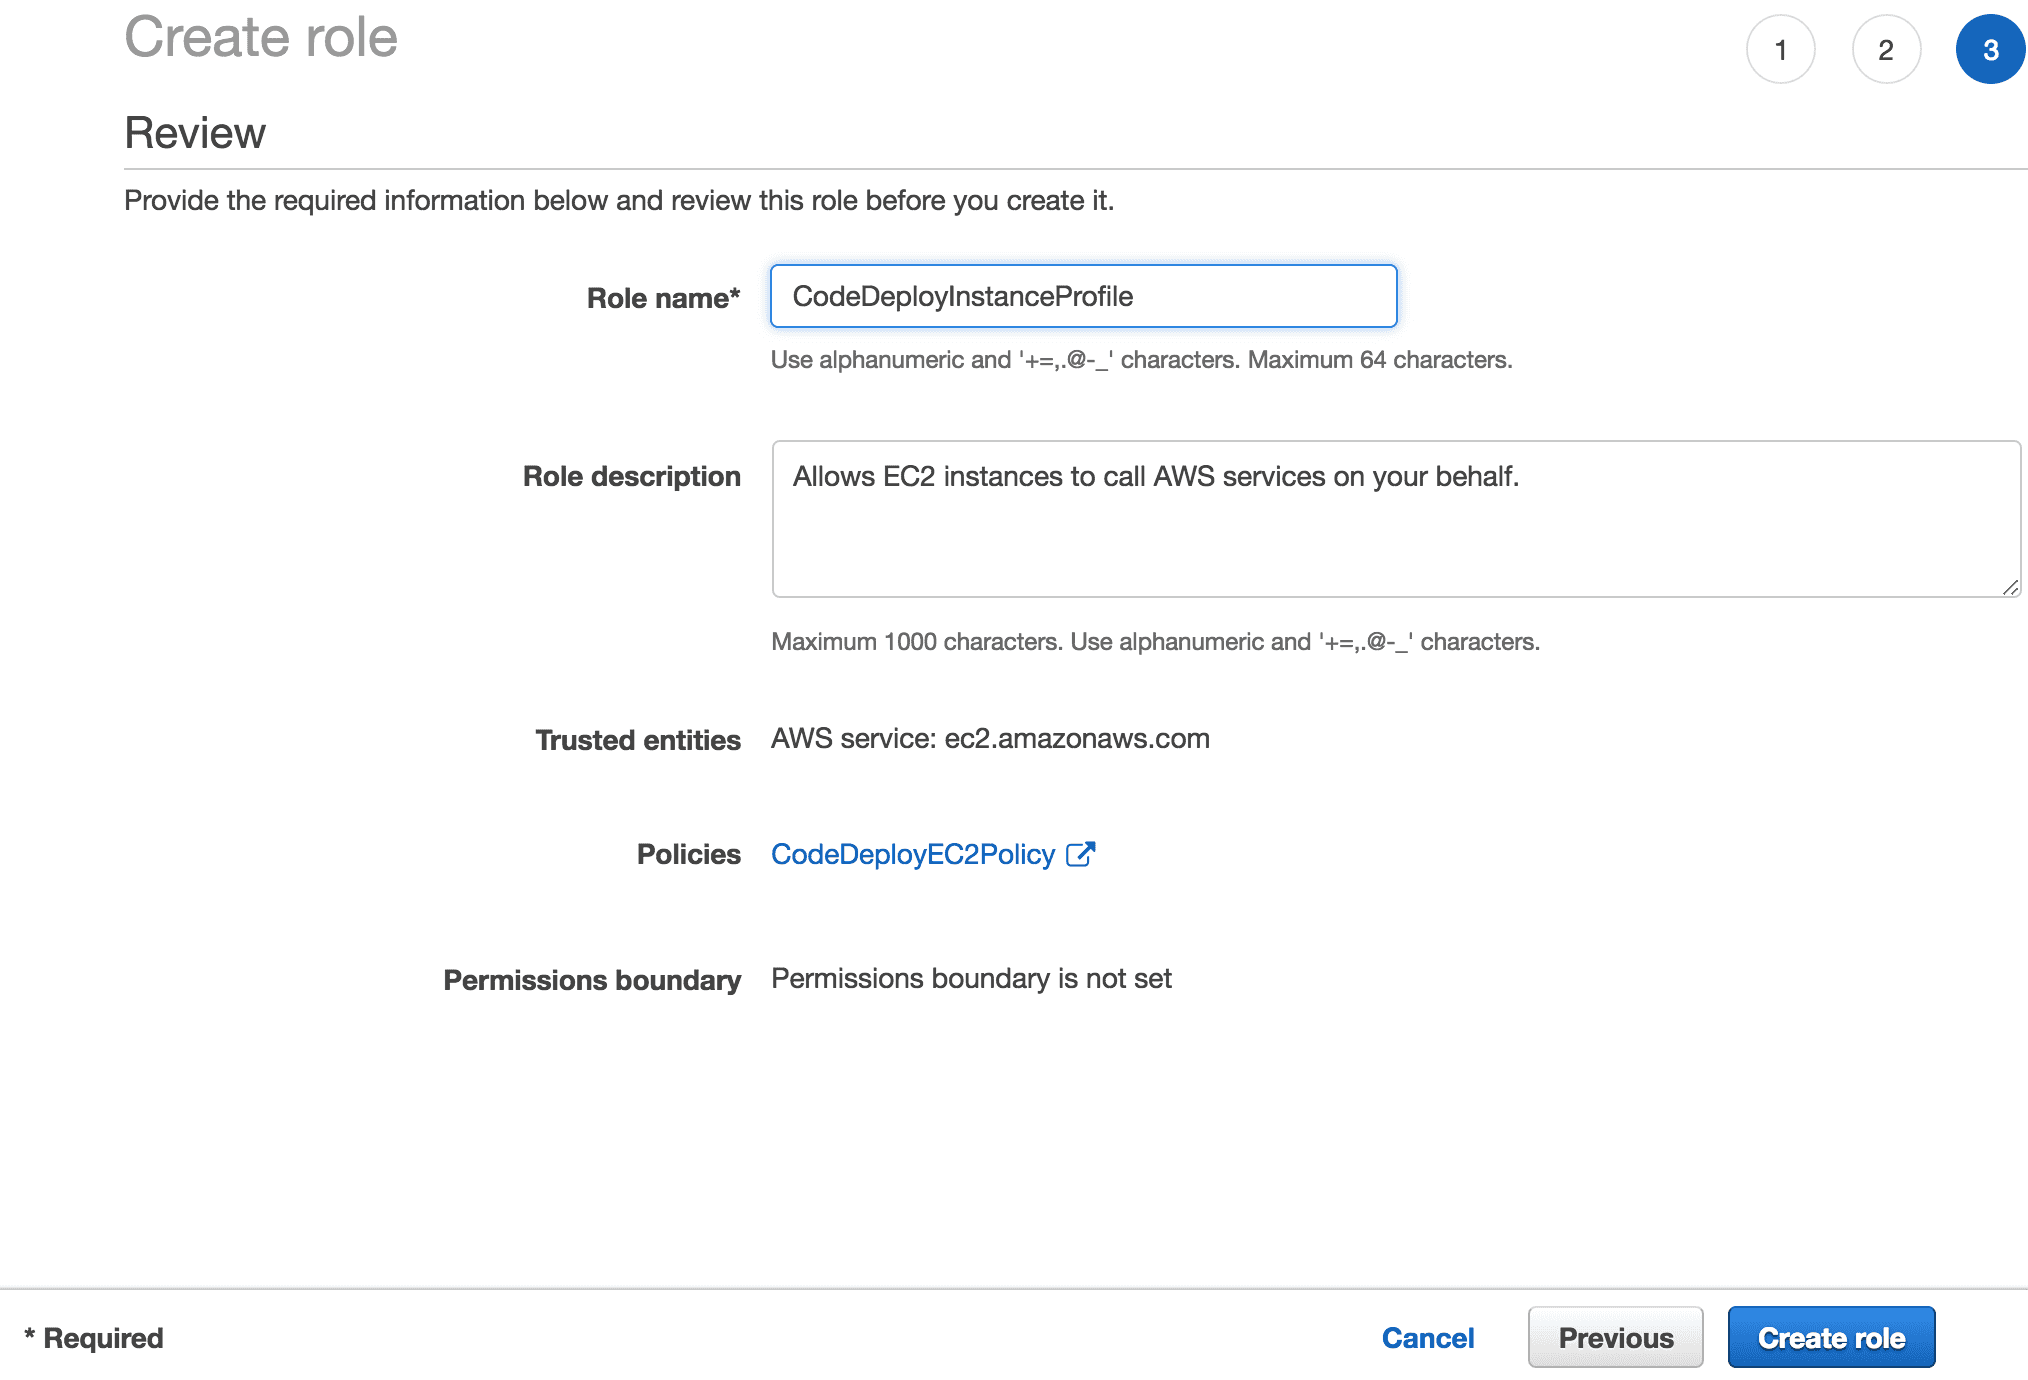
On the last screen give the role a name and click the “Create role” button.
Deploy Application Servers
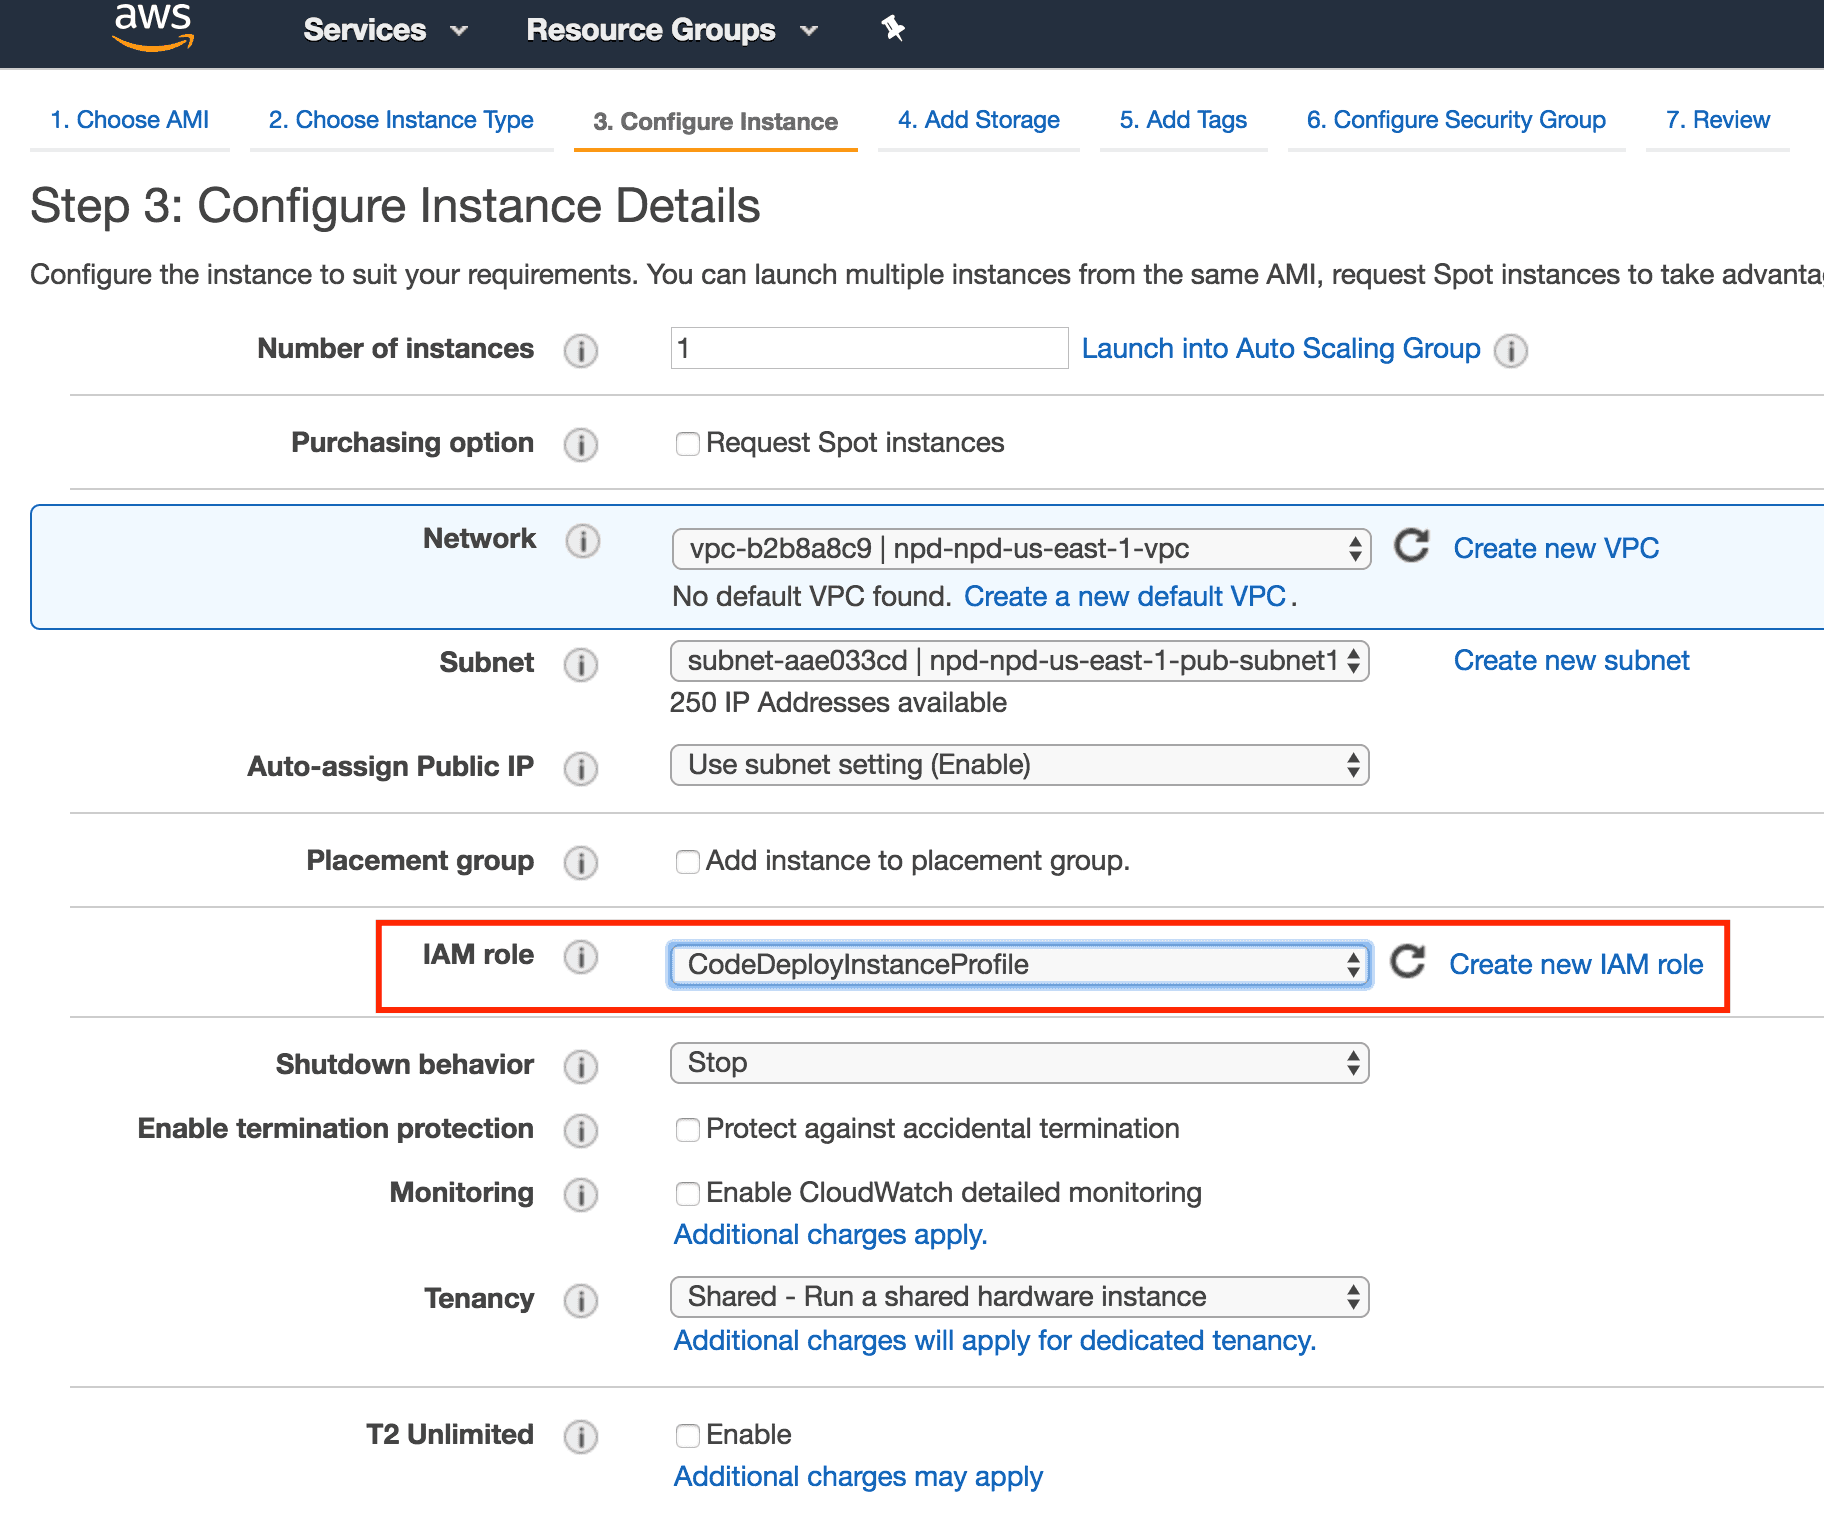
Now that we’ve got that pesky permissions thing taken care of, it’s time to deploy our servers. You can deploy some EC2 instances any way you want, (I prefer CloudFormation, personally.) but for this post, I’ll show you the important pieces in the AWS Console. Be sure to deploy your resources with the IAM role we created in the section prior to this. This instance profile gives the EC2 instance permissions to read from your S3 bucket where your code is stored.
As part of your server build, you’ll need to install the CodeDeploy agent. You can do this manually, or a better way might be to add the code below to the EC2 UserData field during deployment. NOTE: the [bucket-name] field comes from a pre-set list of buckets from AWS and is based on your region. See the list here.
#!/bin/bash
yum -y update
yum install -y ruby
cd /home/ec2-user
curl -0 https://bucket-name.s3.amazonaws.com/latest/install
chmod +x ./install
./install auto
My exact command is shown below, along with the return information. The information returned, tells you how you can push the deployment to your servers, and I recommend using this information to do this. However, in this post, we’ll show what happens when pushing code from the console so we can easily see what happens.

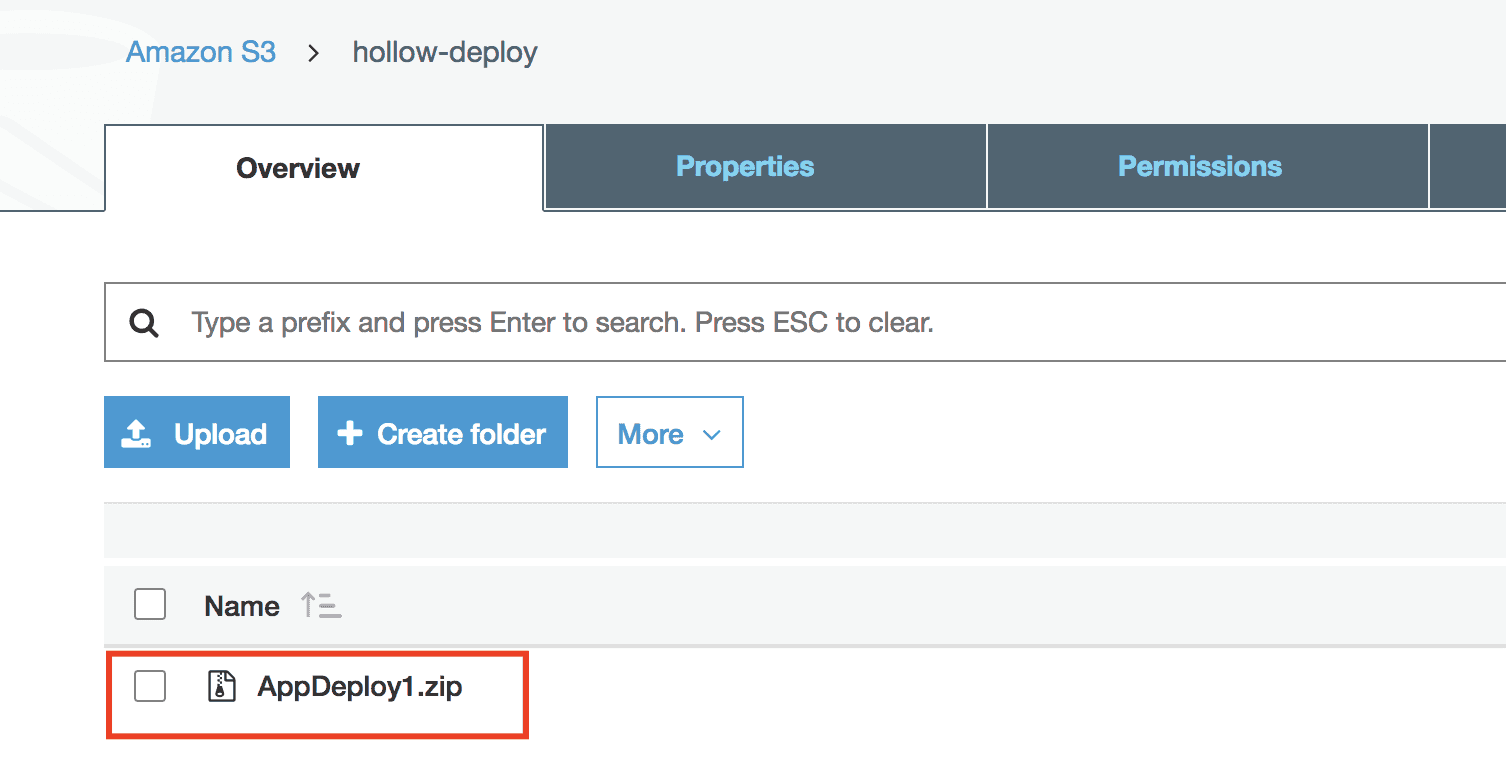
Once the code has been successfully pushed, we’ll do a quick check to show that the zip file is in our S3 bucket, and it is!
Deploy the New Version
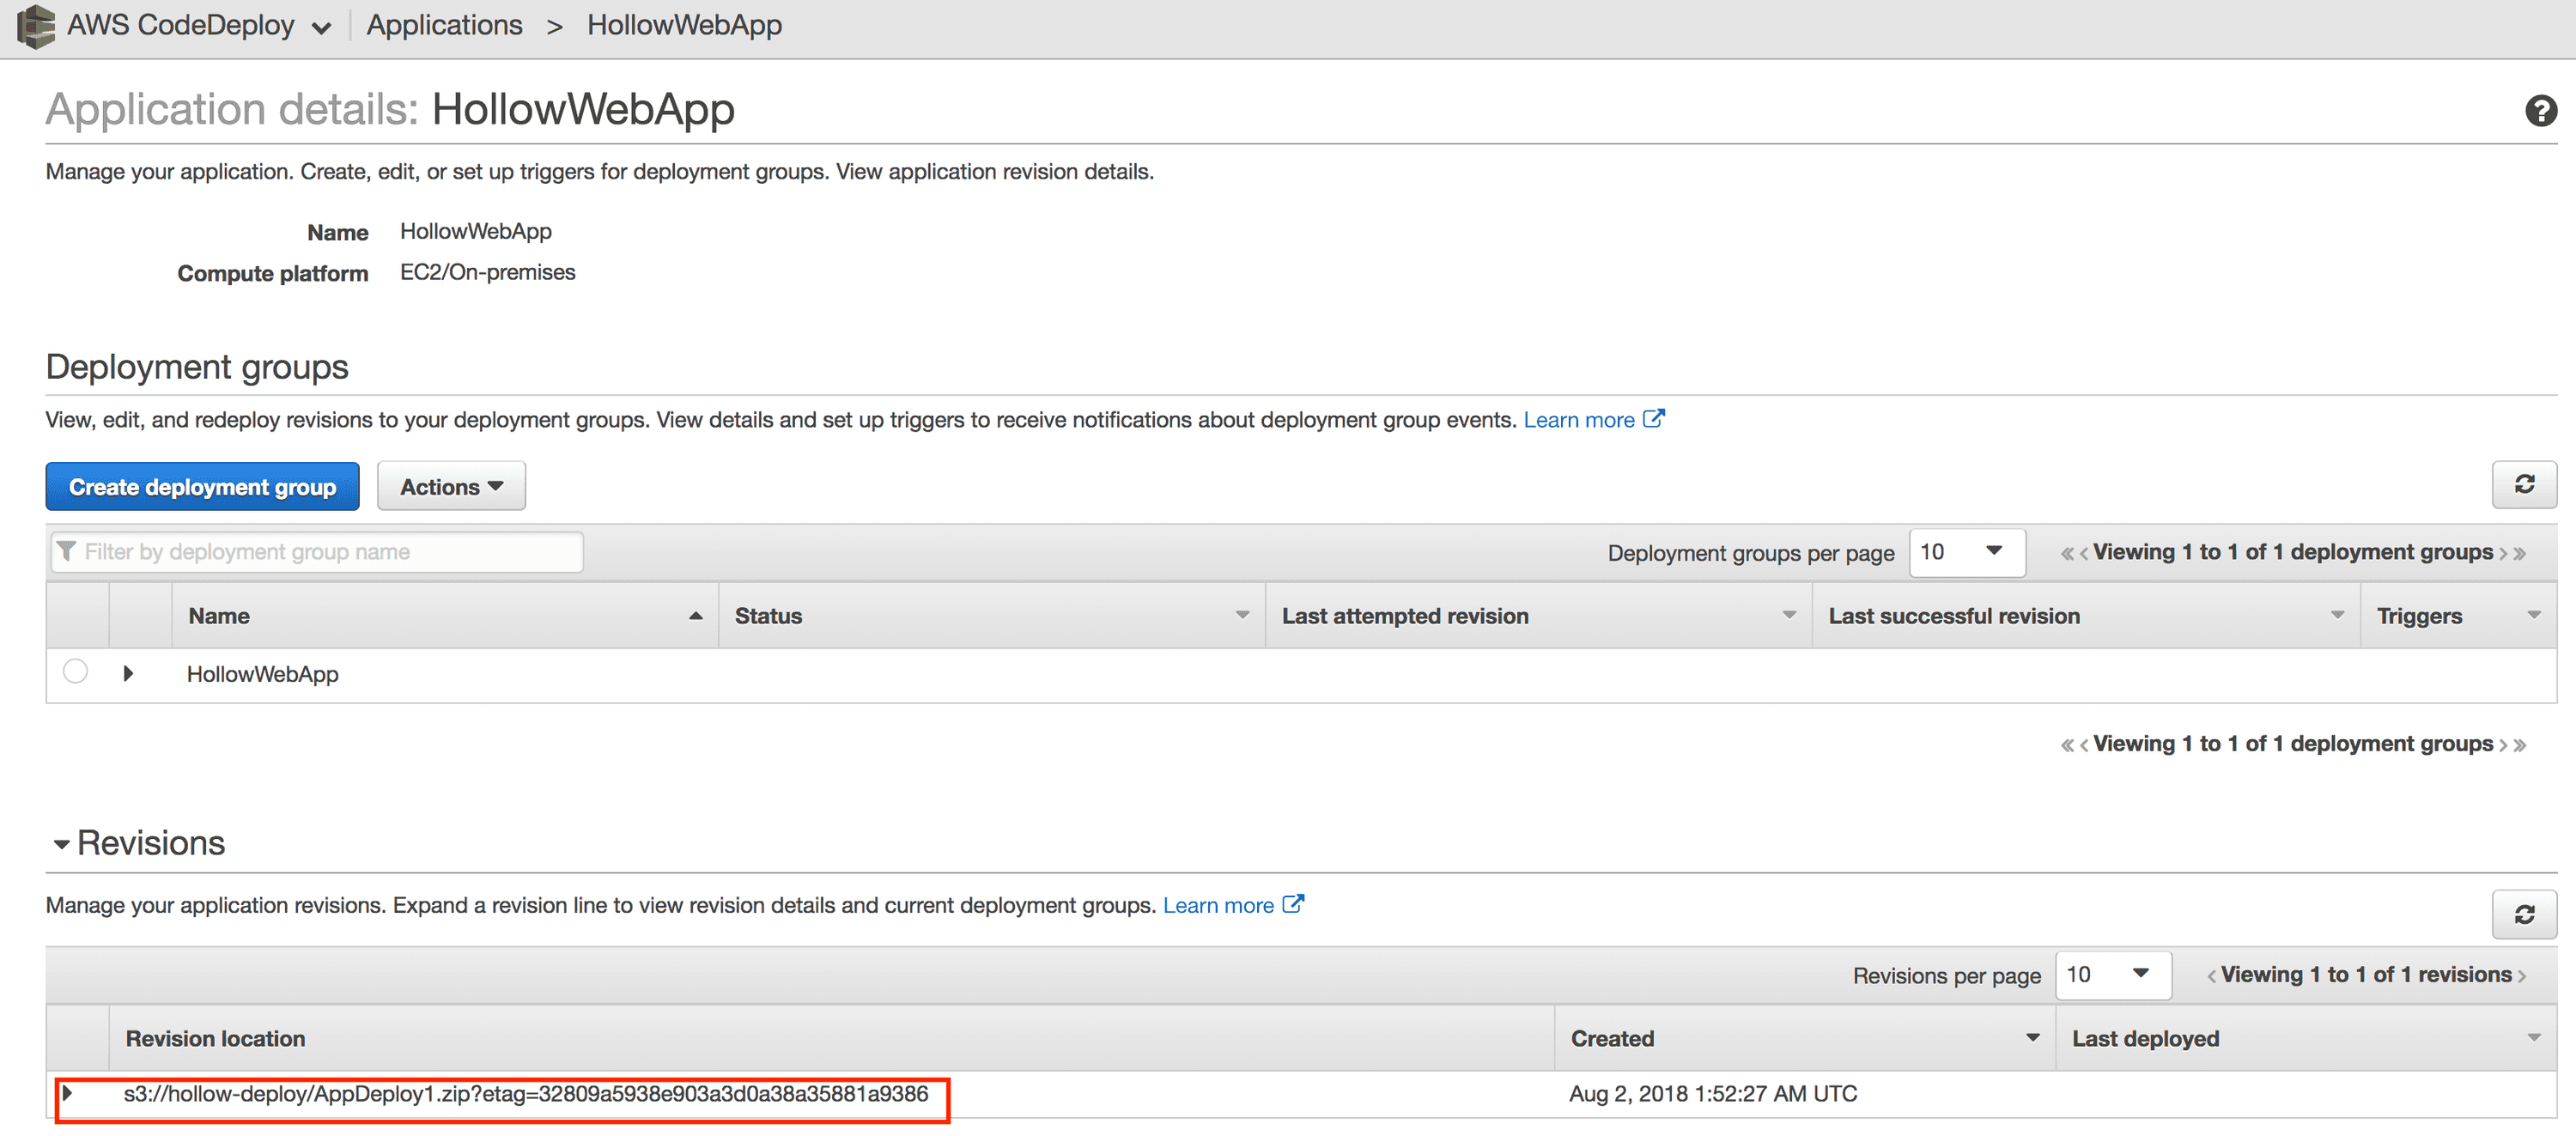
As mentioned, you can now deploy your code to your servers from the command line response you got from pushing your code to S3. To make it more obvious about what happened, let’s take a look at the CodeDeploy console now though. You’ll notice that if you open up your application that there is a “Revision” listed in your list. As you push more versions to your S3 bucket, the list will grow here.
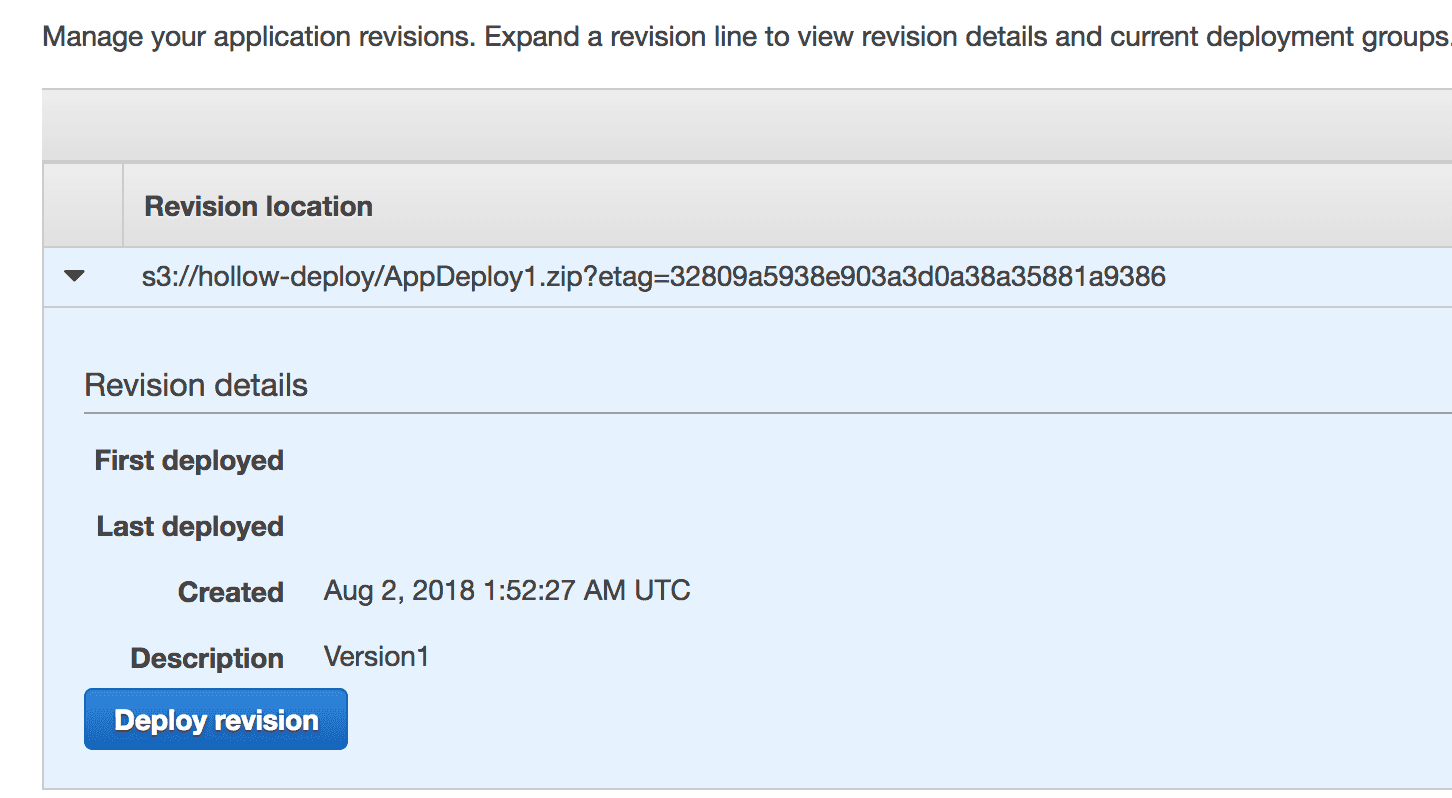
We’re ready to deploy, so click the arrow next to your revision to expand the properties. Click the “Deploy revision” button to kick things off.
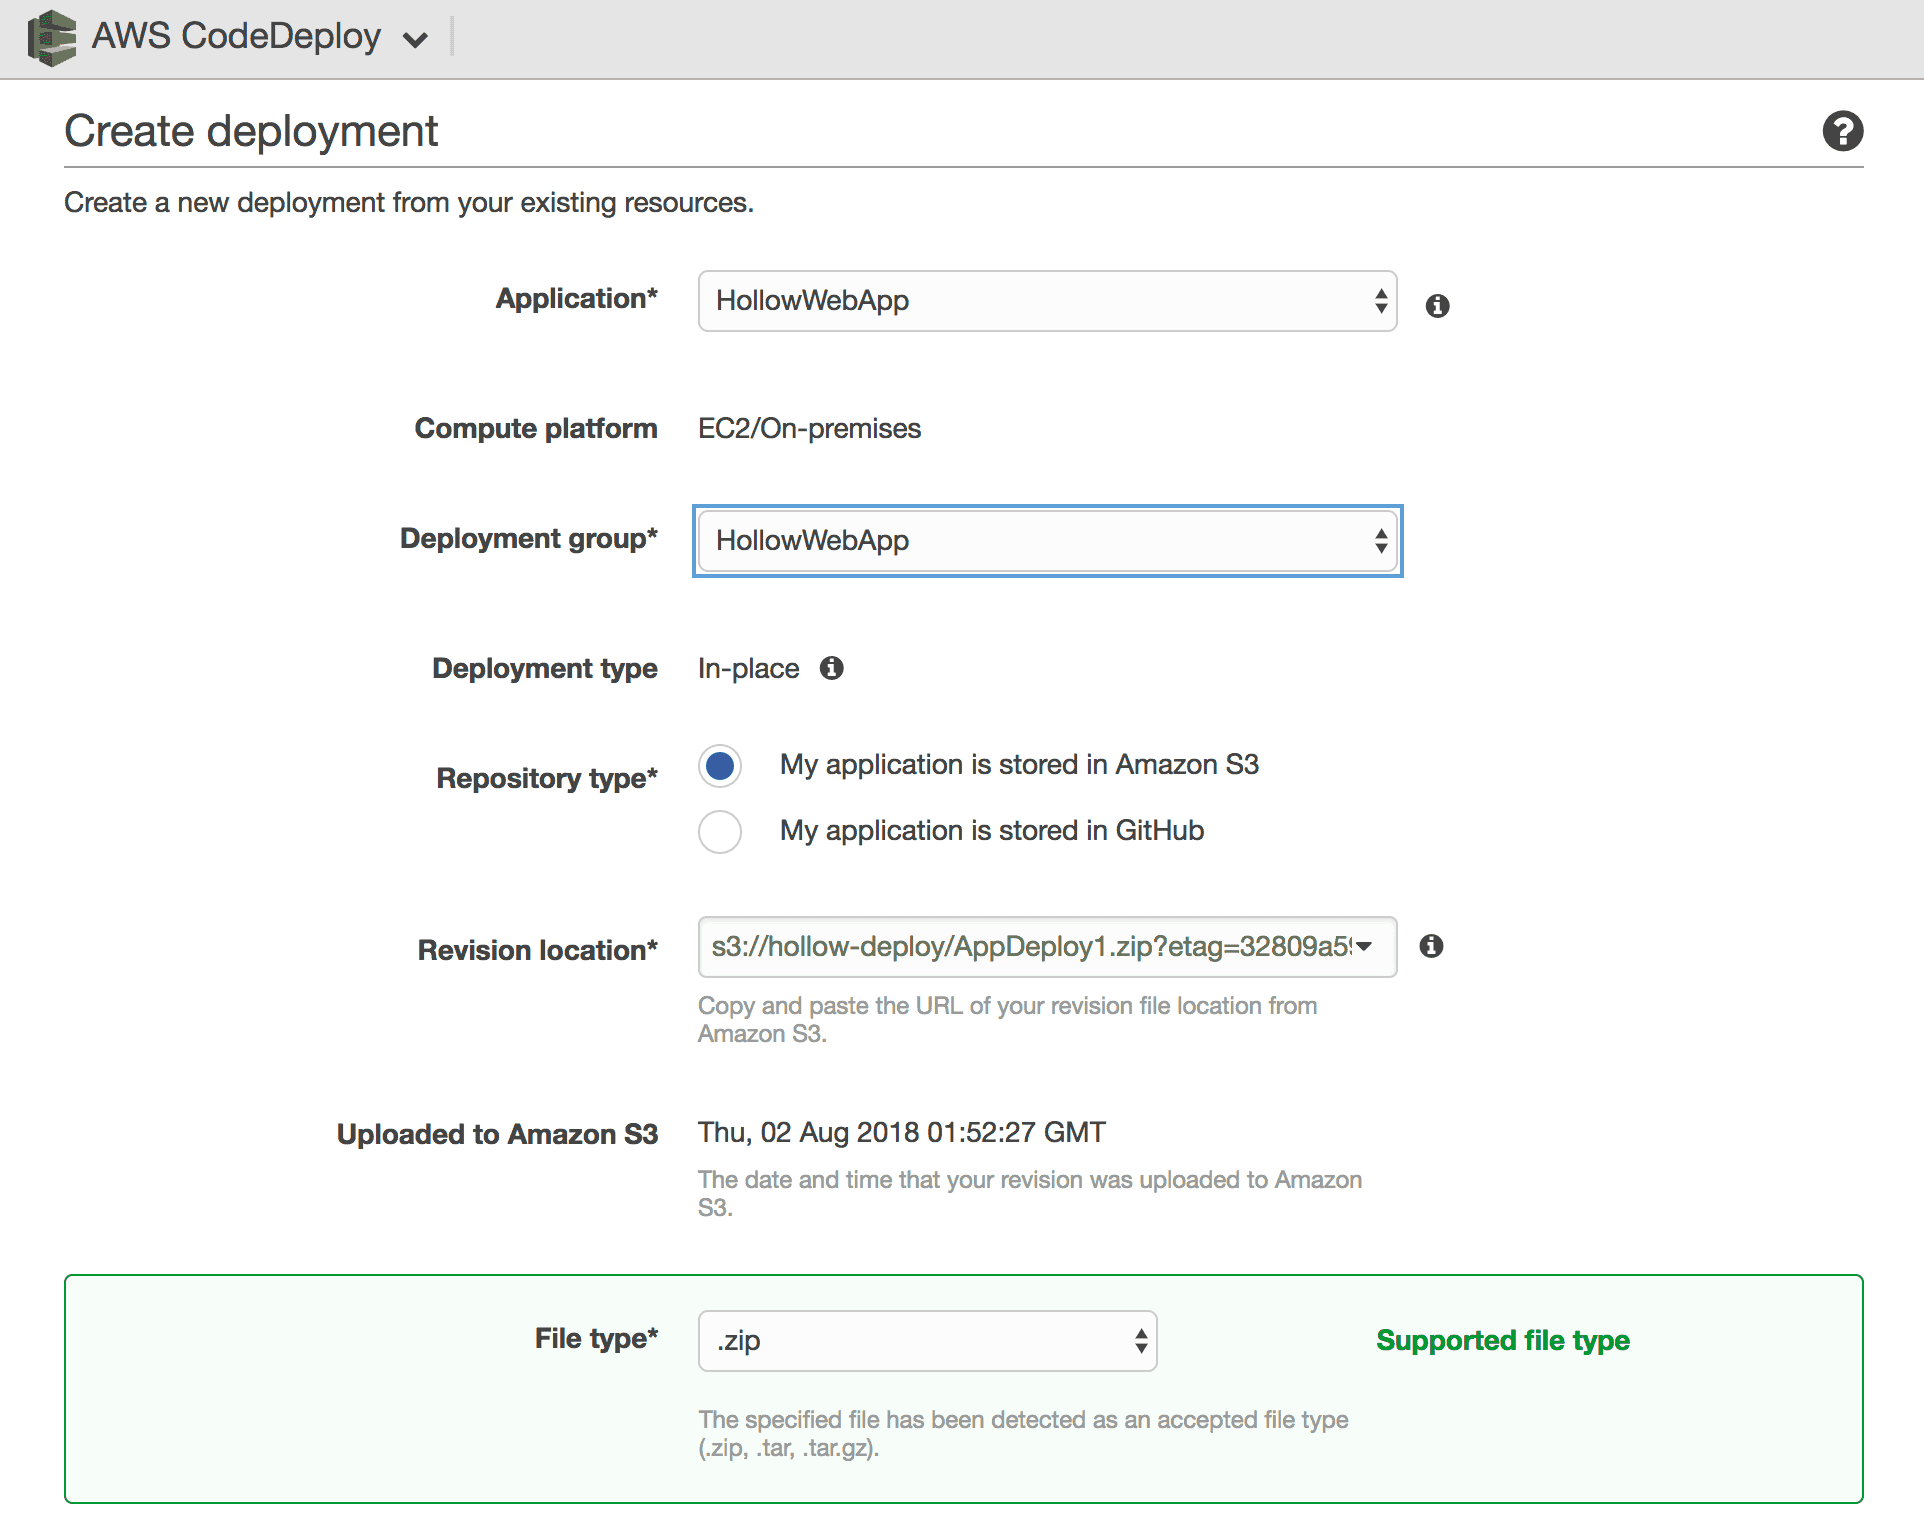
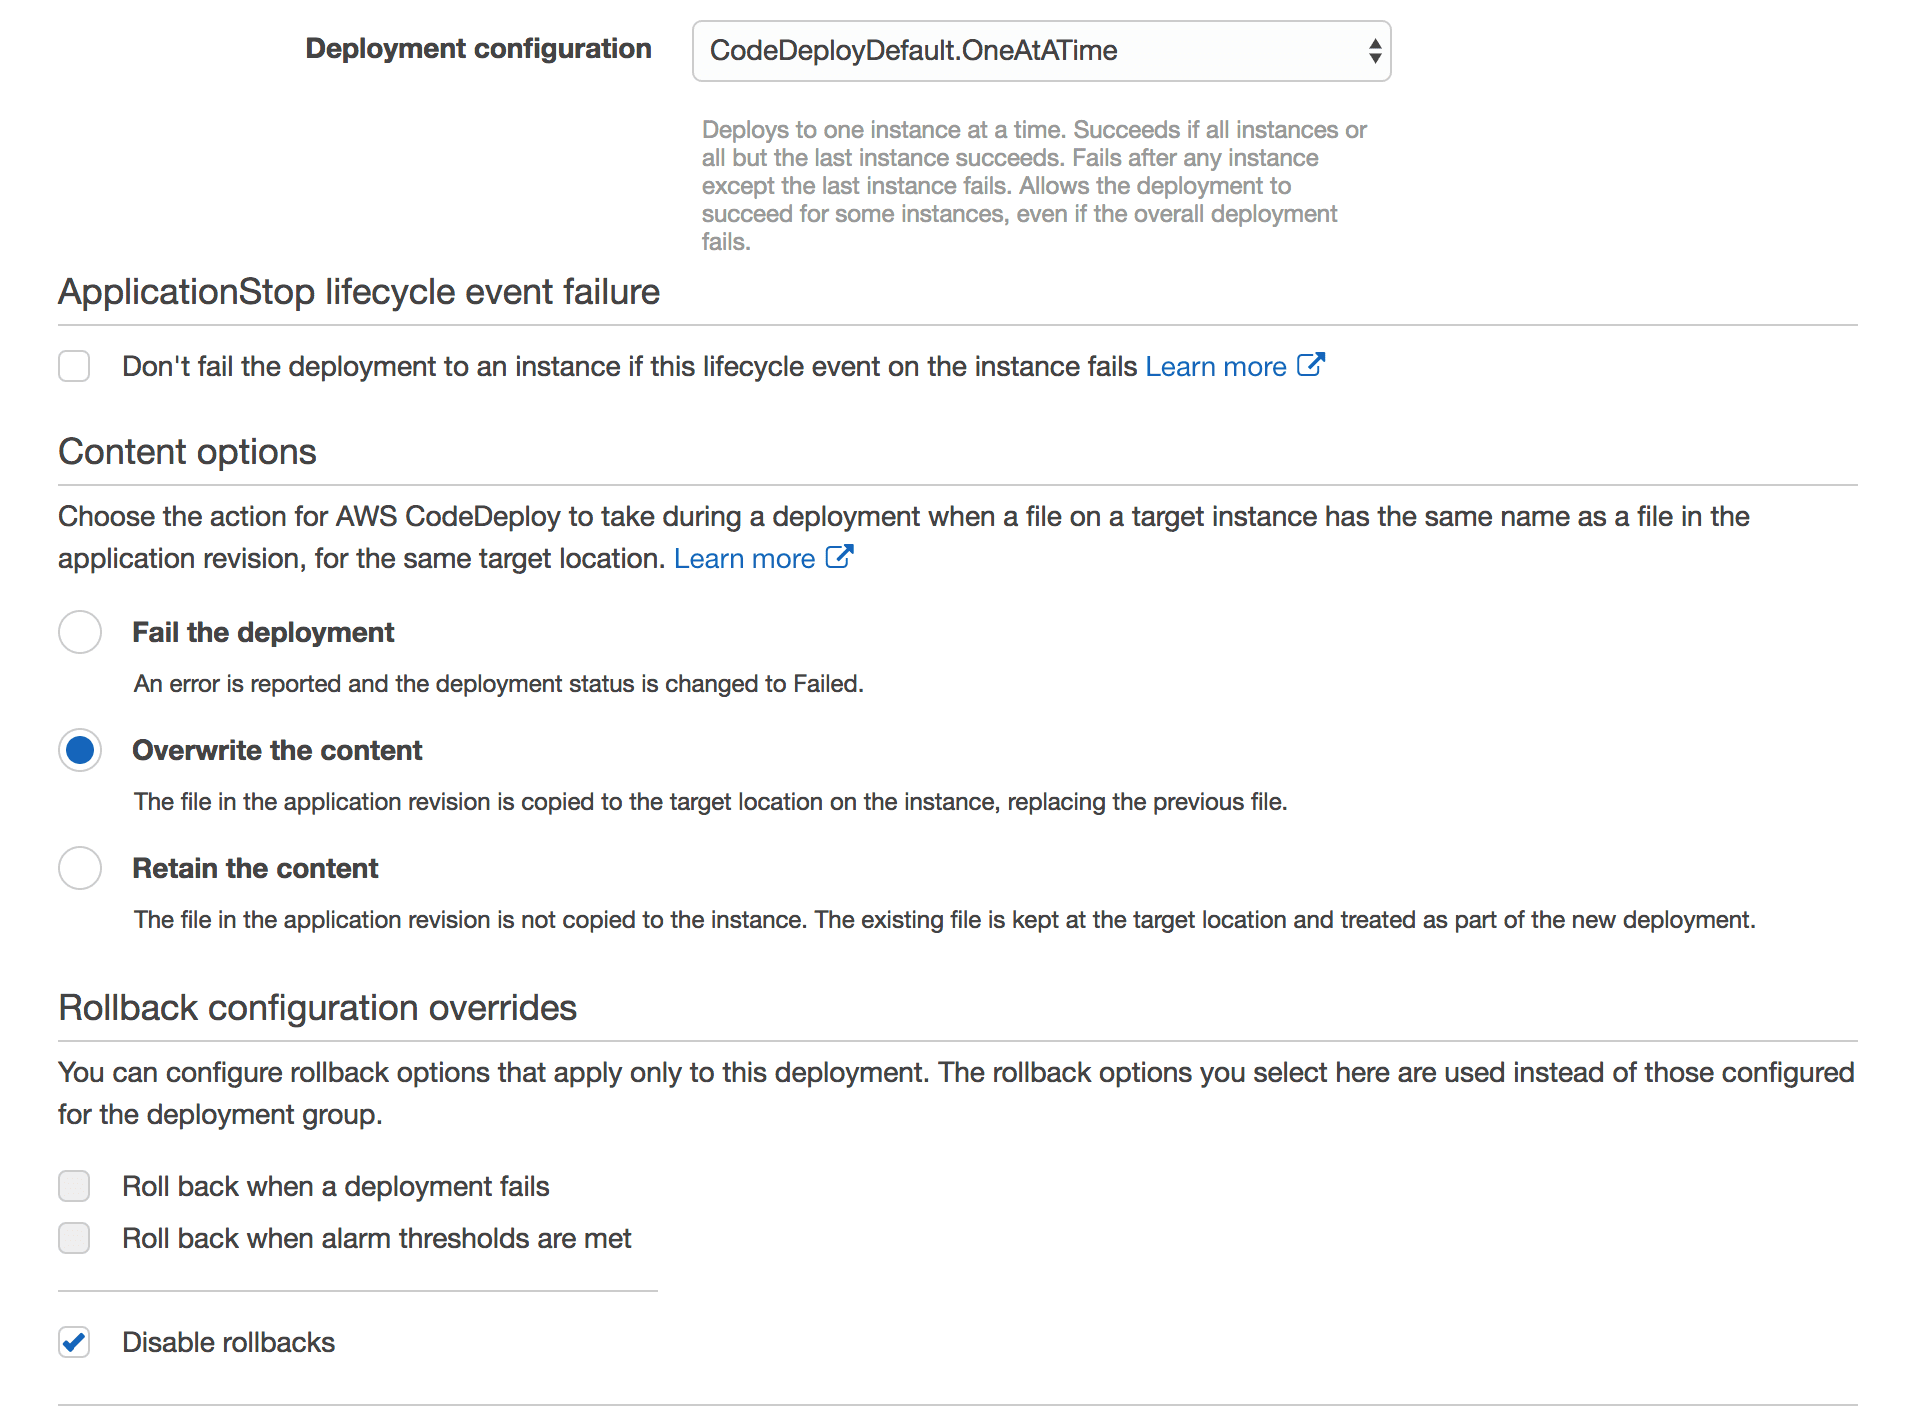
Most of the information should be filled out for you on the next page, but it does give you a nice opportunity to tweak something before the code gets pushed. I, for example, selected the “Overwrite Files” option so that when I push out a new index.html, it will overwrite the existing file and not fail the deployment because of an error.
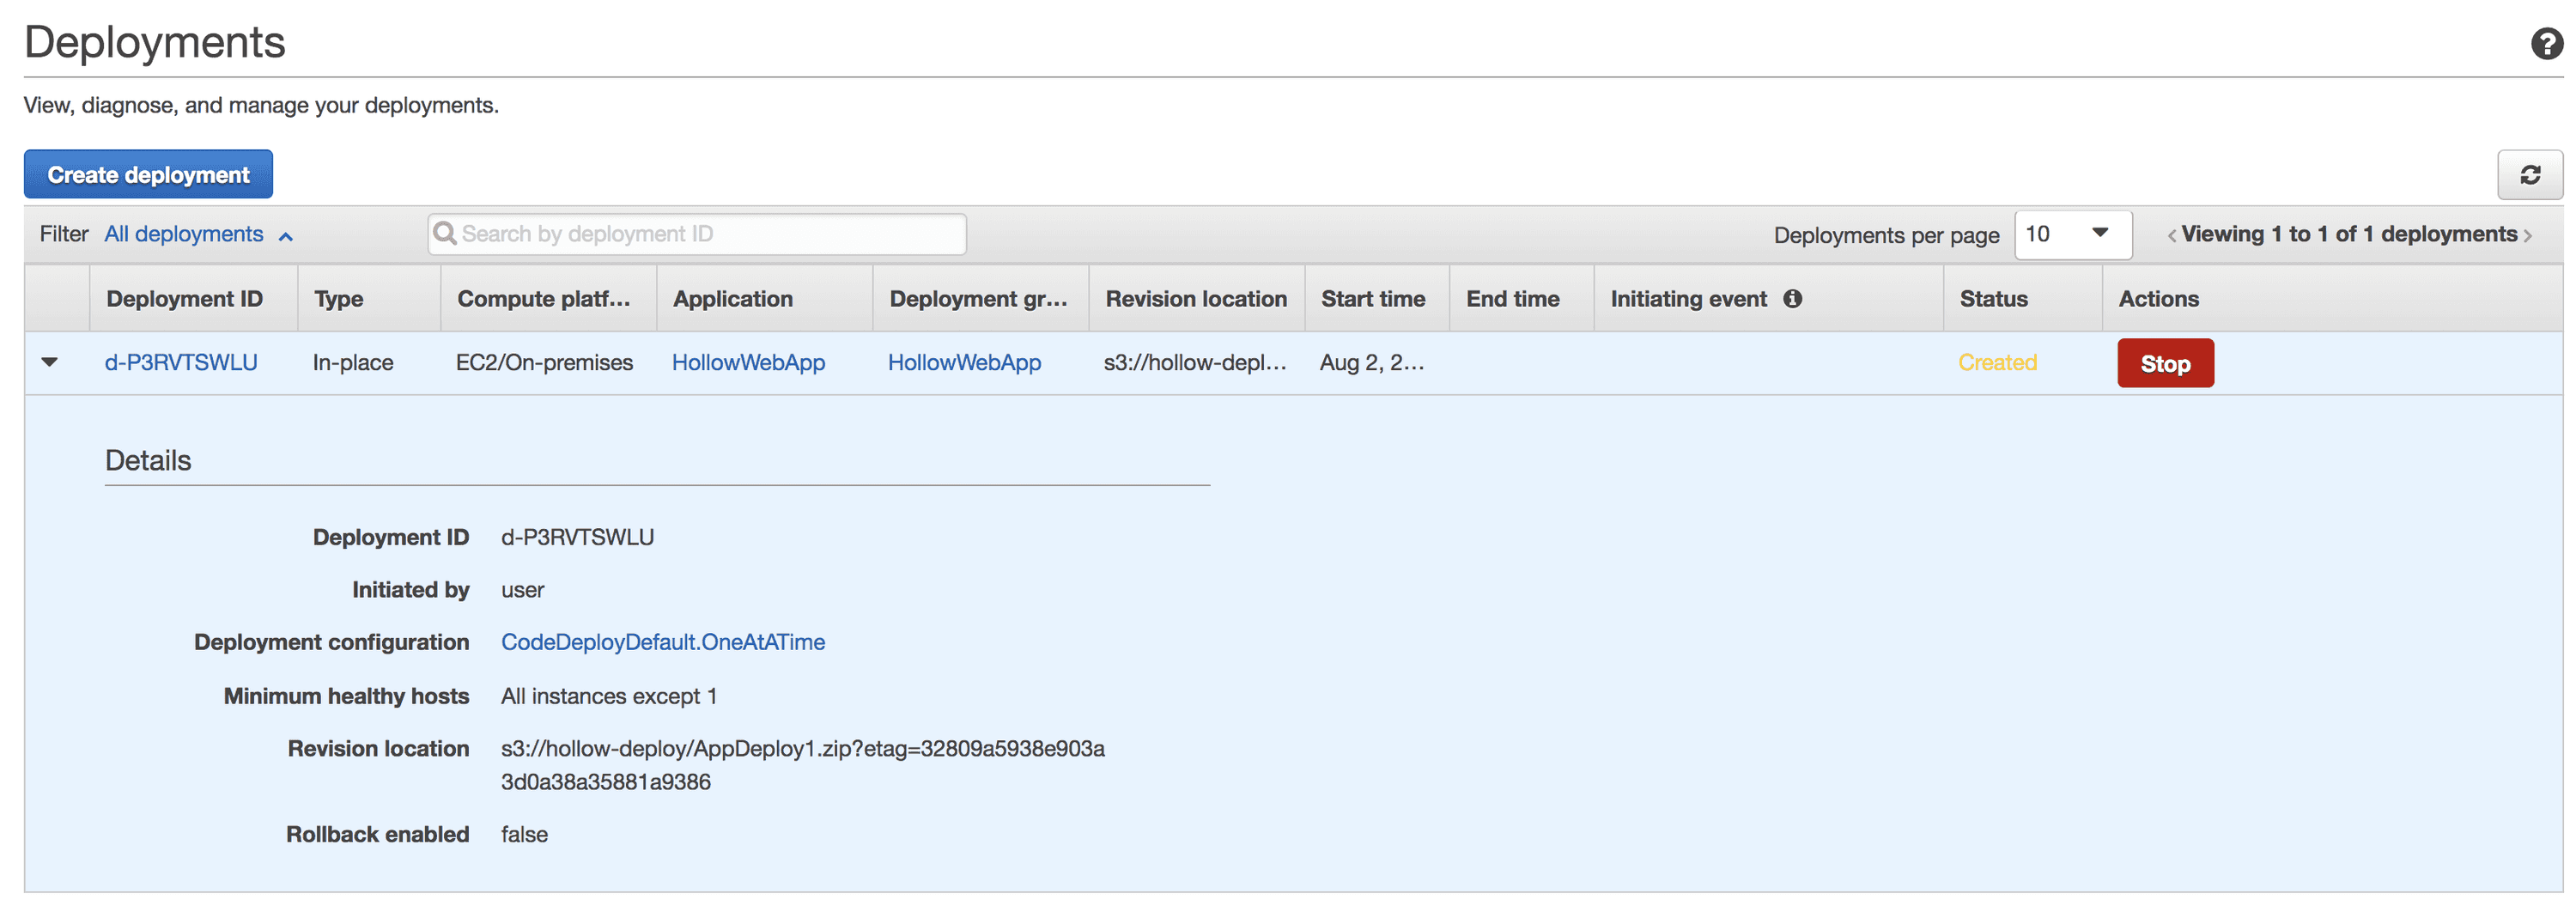
As your deployment is kicked off, you can watch the progress in the console. To get more information, click the Deployment ID to dig deeper.
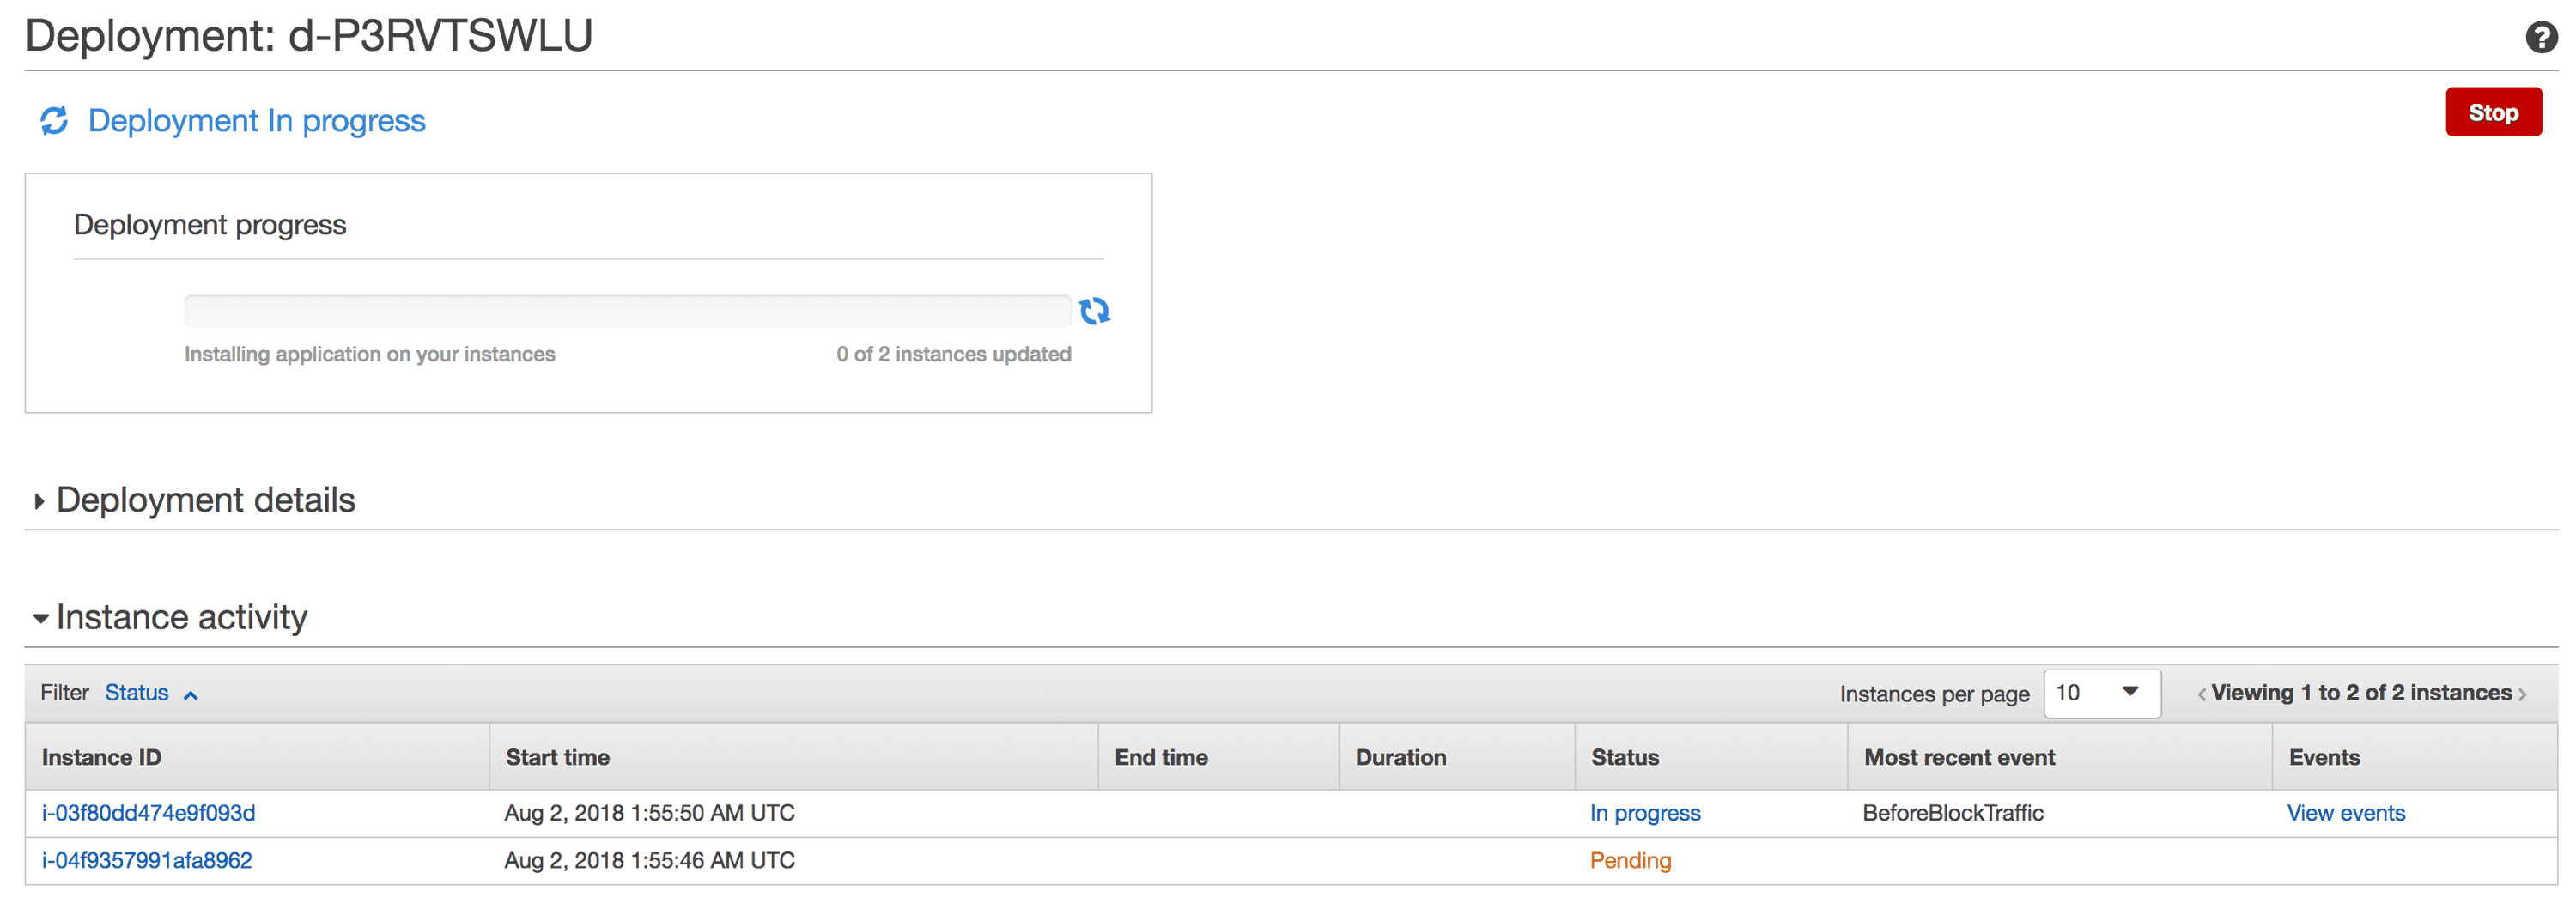
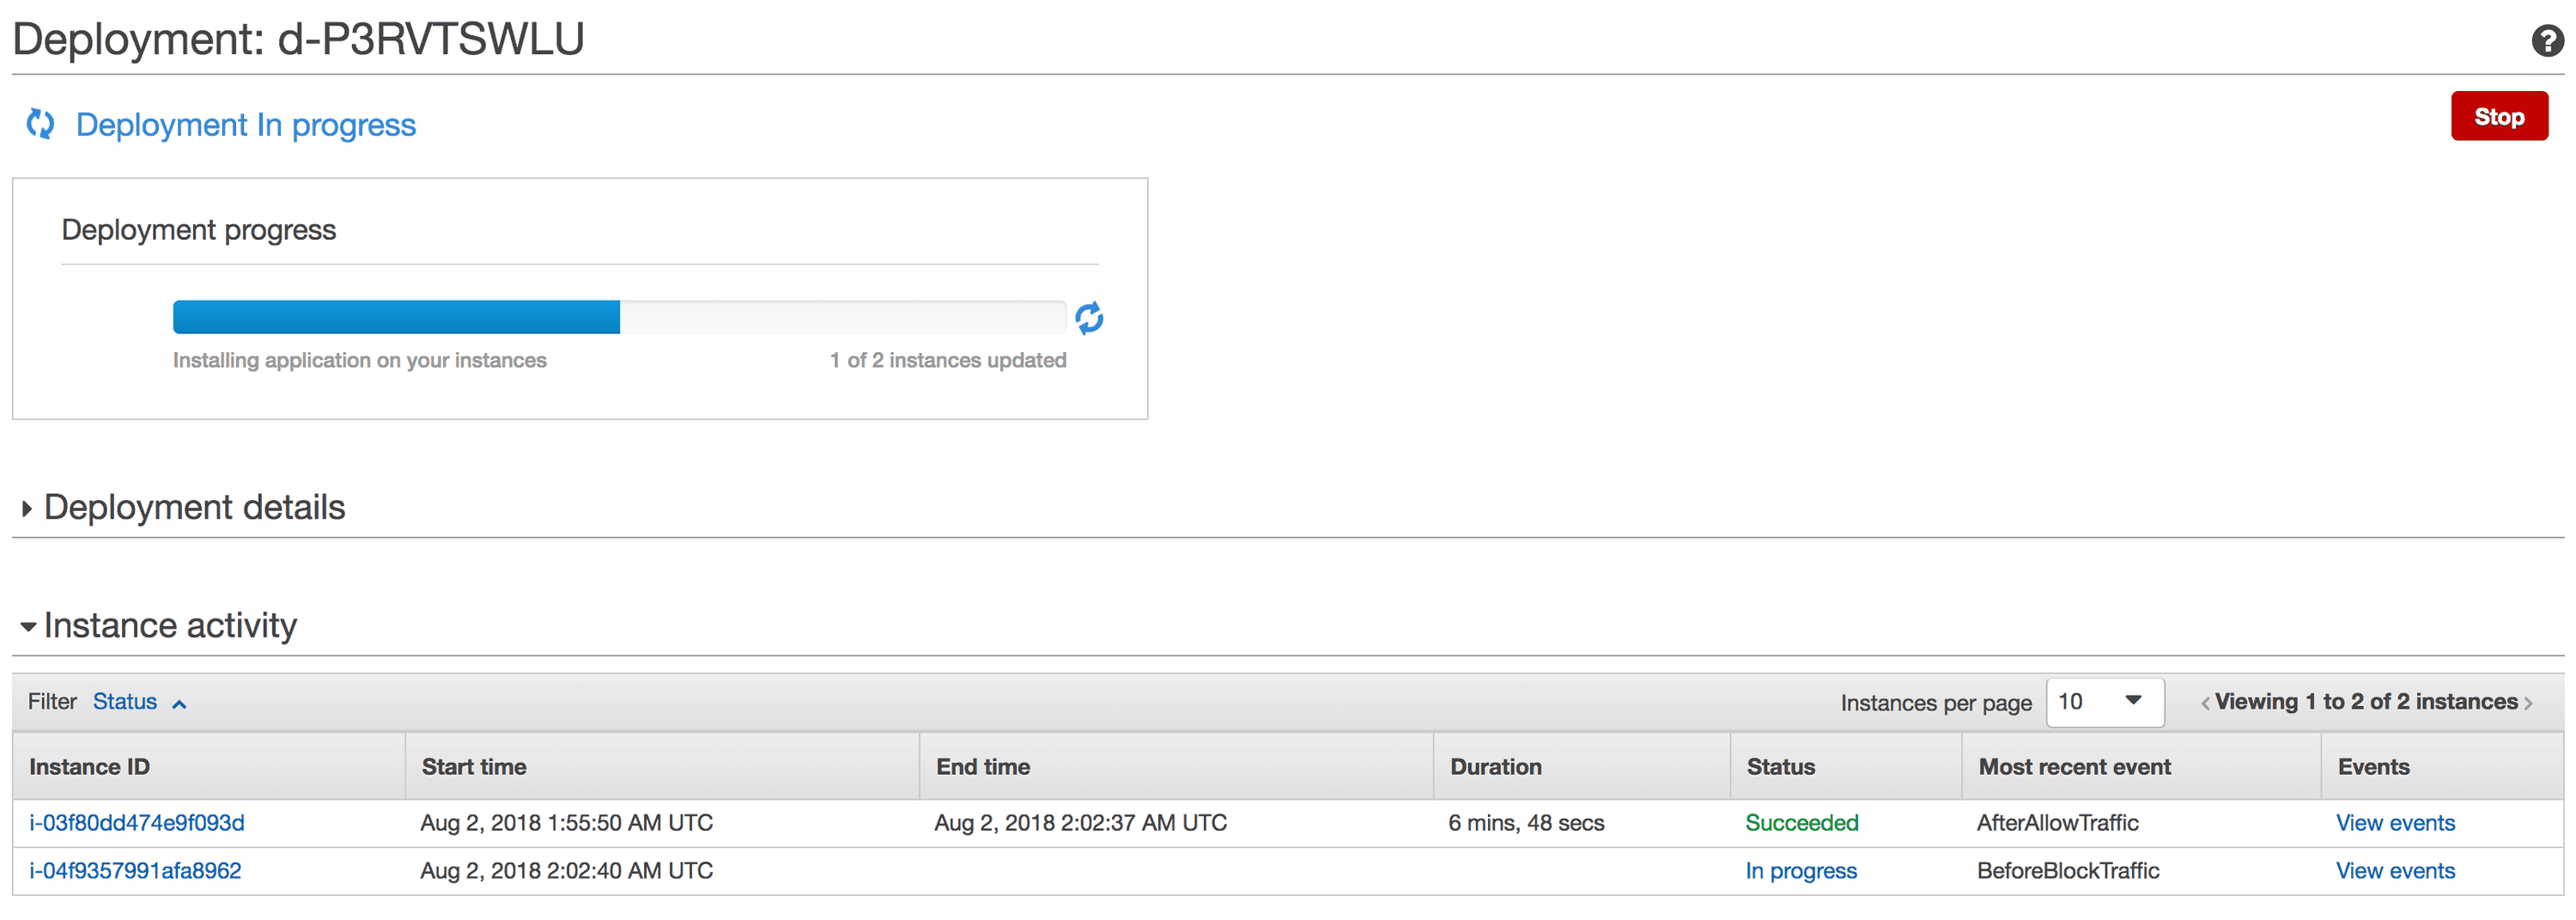
When we drill down into the deployment, we can see that one of my servers is “In progress” while the other is pending. Since I’m doing one at a time, only one of the instances will update for now. To see even more information about this specific instance deploy, click the “View events” link.
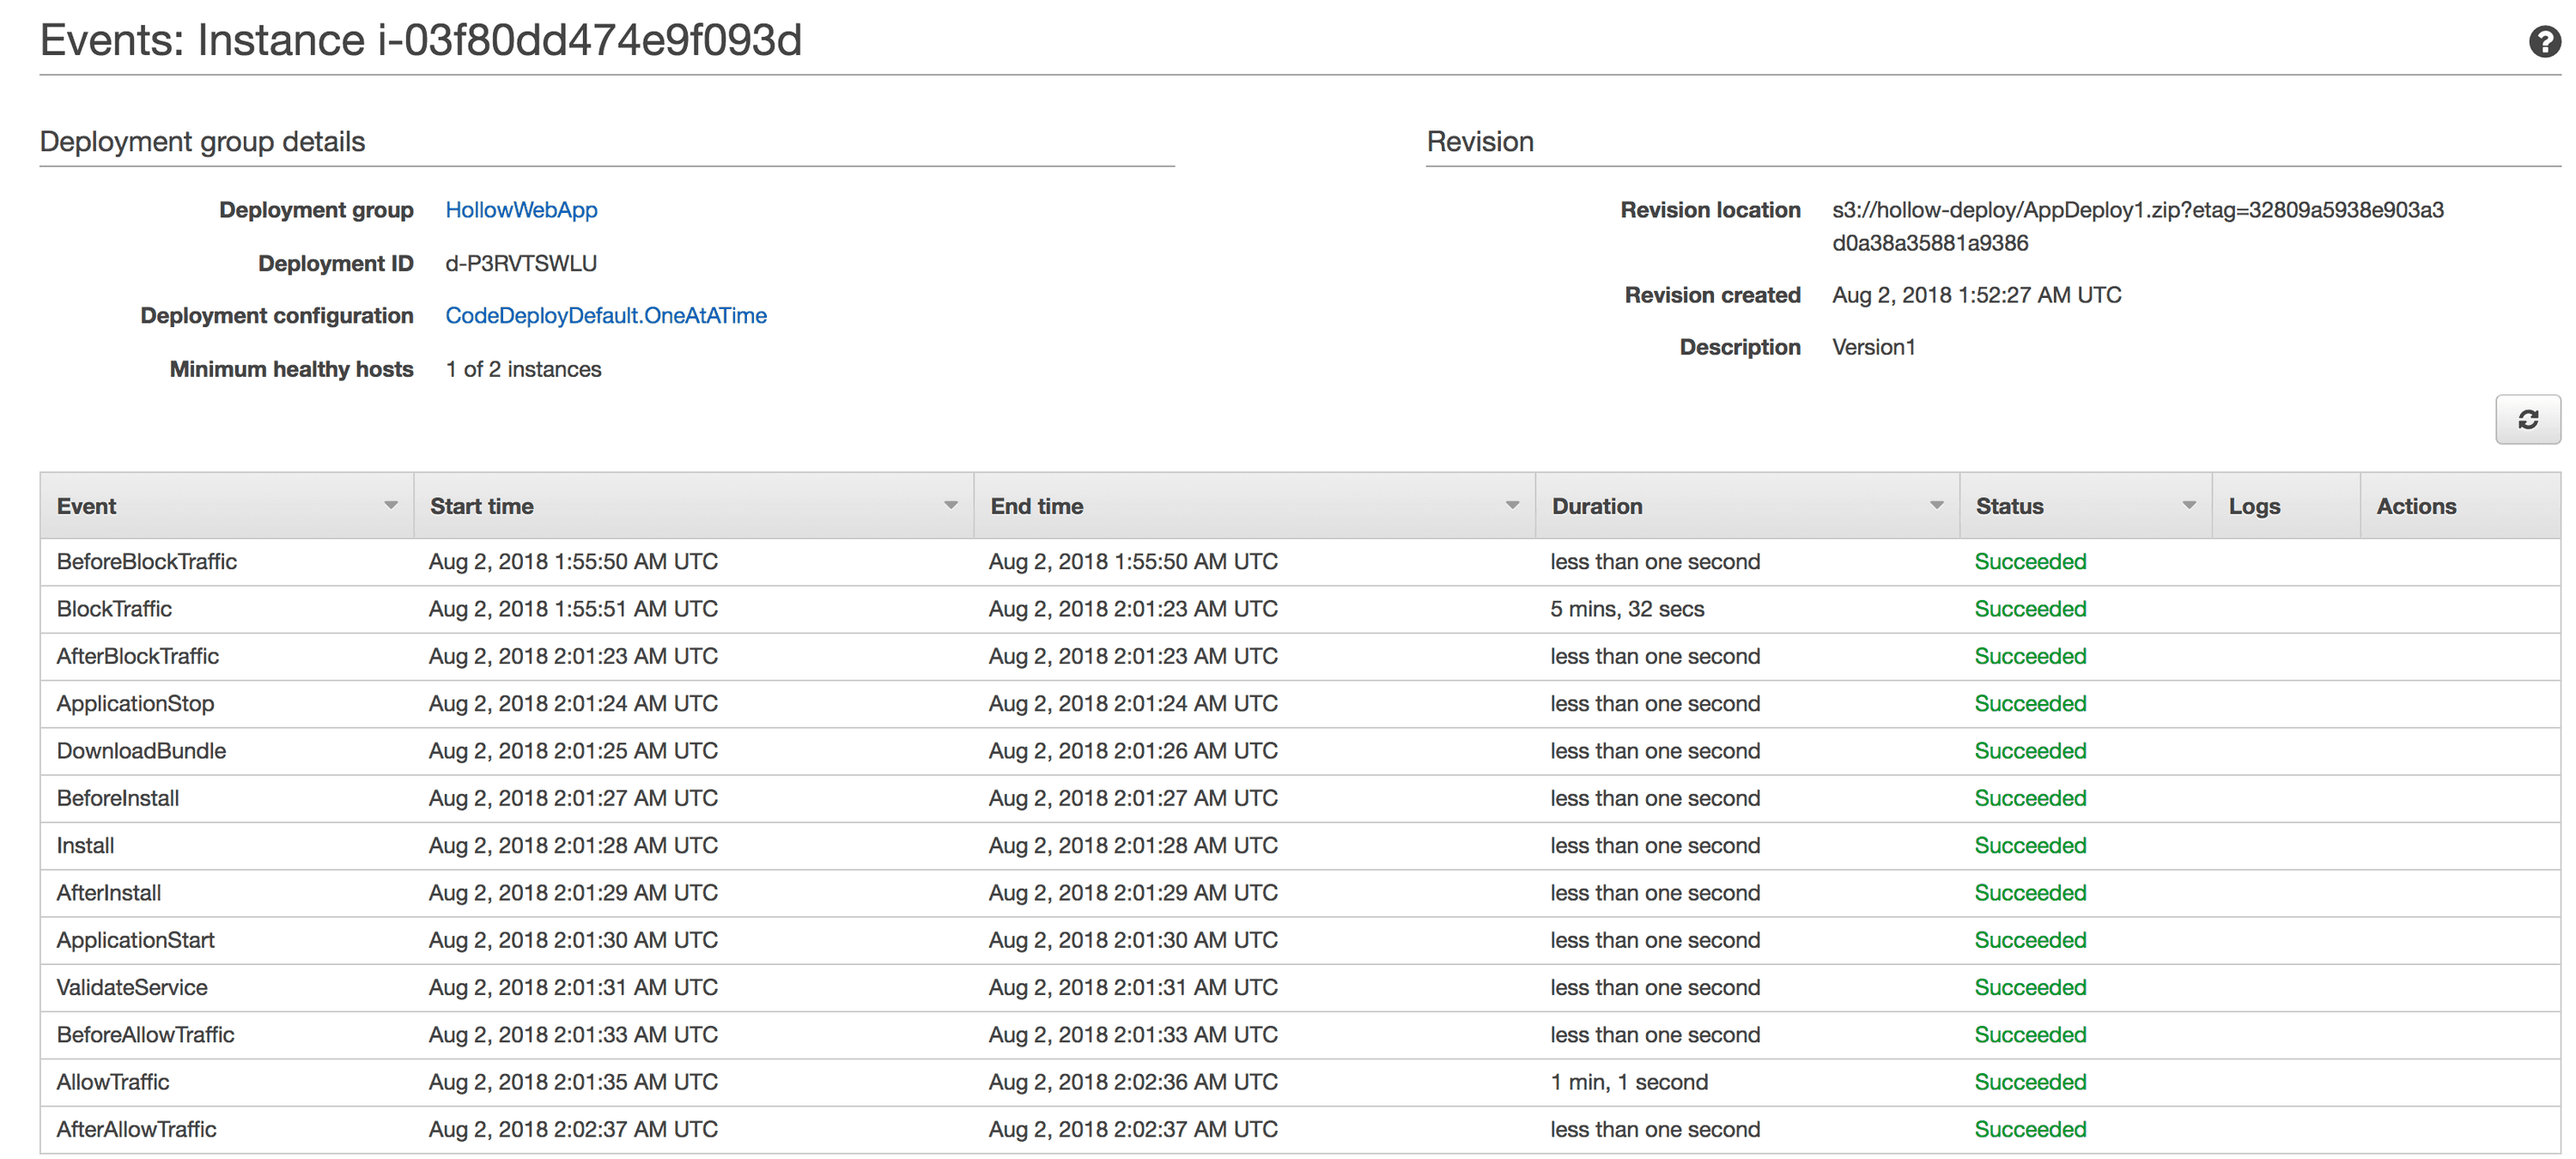
When we look at the events, we can see each of the lifecycle events that the deployment goes through. I’ve waited for a bit to show you that each event was successful.
When we got back to the deployment screen, we see that one server is done, and the next server has started its progression.
When both servers have completed, I check my app again, and I can see that a new version has been deployed.
To stay up-to-date on the latest in tech news and events, follow AHEAD on Twitter and LinkedIn or subscribe to our newsletter above.
(This blog post originally appeared on The IT Hollow.)
